> ## Documentation Index
> Fetch the complete documentation index at: https://private-7c7dfe99-postgresql-tls-support.mintlify.site/llms.txt
> Use this file to discover all available pages before exploring further.

> QStudio is a free SQL tool.

# Connect QStudio to ClickHouse

export const CommunityMaintainedBadge = () => {
  return <div className="CommunityMaintainedBadge">
            <div className="CommunityMaintainedIcon">
            <svg xmlns="http://www.w3.org/2000/svg" width="20" height="20" fill="currentColor" viewBox="0 0 256 256">
                <path d="M244.8,150.4a8,8,0,0,1-11.2-1.6A51.6,51.6,0,0,0,192,128a8,8,0,0,1-7.37-4.89,8,8,0,0,1,0-6.22A8,8,0,0,1,192,112a24,24,0,1,0-23.24-30,8,8,0,1,1-15.5-4A40,40,0,1,1,219,117.51a67.94,67.94,0,0,1,27.43,21.68A8,8,0,0,1,244.8,150.4ZM190.92,212a8,8,0,1,1-13.84,8,57,57,0,0,0-98.16,0,8,8,0,1,1-13.84-8,72.06,72.06,0,0,1,33.74-29.92,48,48,0,1,1,58.36,0A72.06,72.06,0,0,1,190.92,212ZM128,176a32,32,0,1,0-32-32A32,32,0,0,0,128,176ZM72,120a8,8,0,0,0-8-8A24,24,0,1,1,87.24,82a8,8,0,1,0,15.5-4A40,40,0,1,0,37,117.51,67.94,67.94,0,0,0,9.6,139.19a8,8,0,1,0,12.8,9.61A51.6,51.6,0,0,1,64,128,8,8,0,0,0,72,120Z"></path>
            </svg>
        </div>
            Community Maintained
        </div>;
};

export const Image = ({img, alt, size = "lg"}) => {
  const normalizedSize = ["sm", "md", "lg"].includes(size) ? size : "lg";
  return <div className={`ch-image-${normalizedSize}`}>
      <Frame>
        <img src={img} alt={alt} />
      </Frame>
    </div>;
};

QStudio is a free SQL GUI, it allows running SQL scripts, easy browsing of tables, charting and exporting of results. It works on every operating system, with every database.

QStudio connects to ClickHouse using JDBC.

<Steps>
  <Step title="Gather your ClickHouse details" id="1-gather-your-clickhouse-details">
    QStudio uses JDBC over HTTP(S) to connect to ClickHouse; you need:

    * endpoint
    * port number
    * username
    * password

    To connect to ClickHouse with HTTP(S) you need this information:

    | Parameter(s)              | Description                                                                                                    |
    | ------------------------- | -------------------------------------------------------------------------------------------------------------- |
    | `HOST` and `PORT`         | Typically, the port is 8443 when using TLS or 8123 when not using TLS.                                         |
    | `DATABASE NAME`           | Out of the box, there is a database named `default`, use the name of the database that you want to connect to. |
    | `USERNAME` and `PASSWORD` | Out of the box, the username is `default`. Use the username appropriate for your use case.                     |

    The details for your ClickHouse Cloud service are available in the ClickHouse Cloud console.
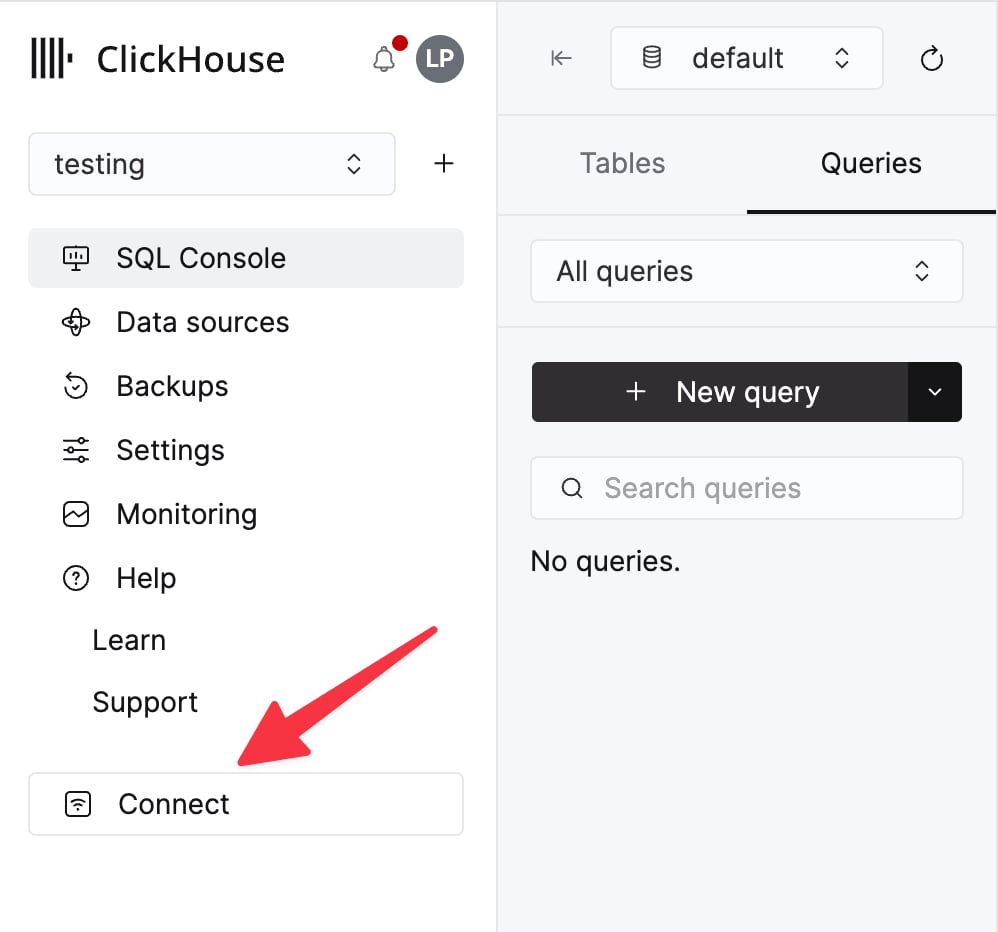
    Select a service and click **Connect**:

    <div className="ch-image-md">
      <Frame>
        <img src="https://mintcdn.com/private-7c7dfe99-postgresql-tls-support/cTIaEq6k6KYDgBI1/images/_snippets/cloud-connect-button.webp?fit=max&auto=format&n=cTIaEq6k6KYDgBI1&q=85&s=dd441fc2272e292760011d48e81d43d4" alt="ClickHouse Cloud service connect button" width="998" height="932" data-path="images/_snippets/cloud-connect-button.webp" />
      </Frame>
    </div>

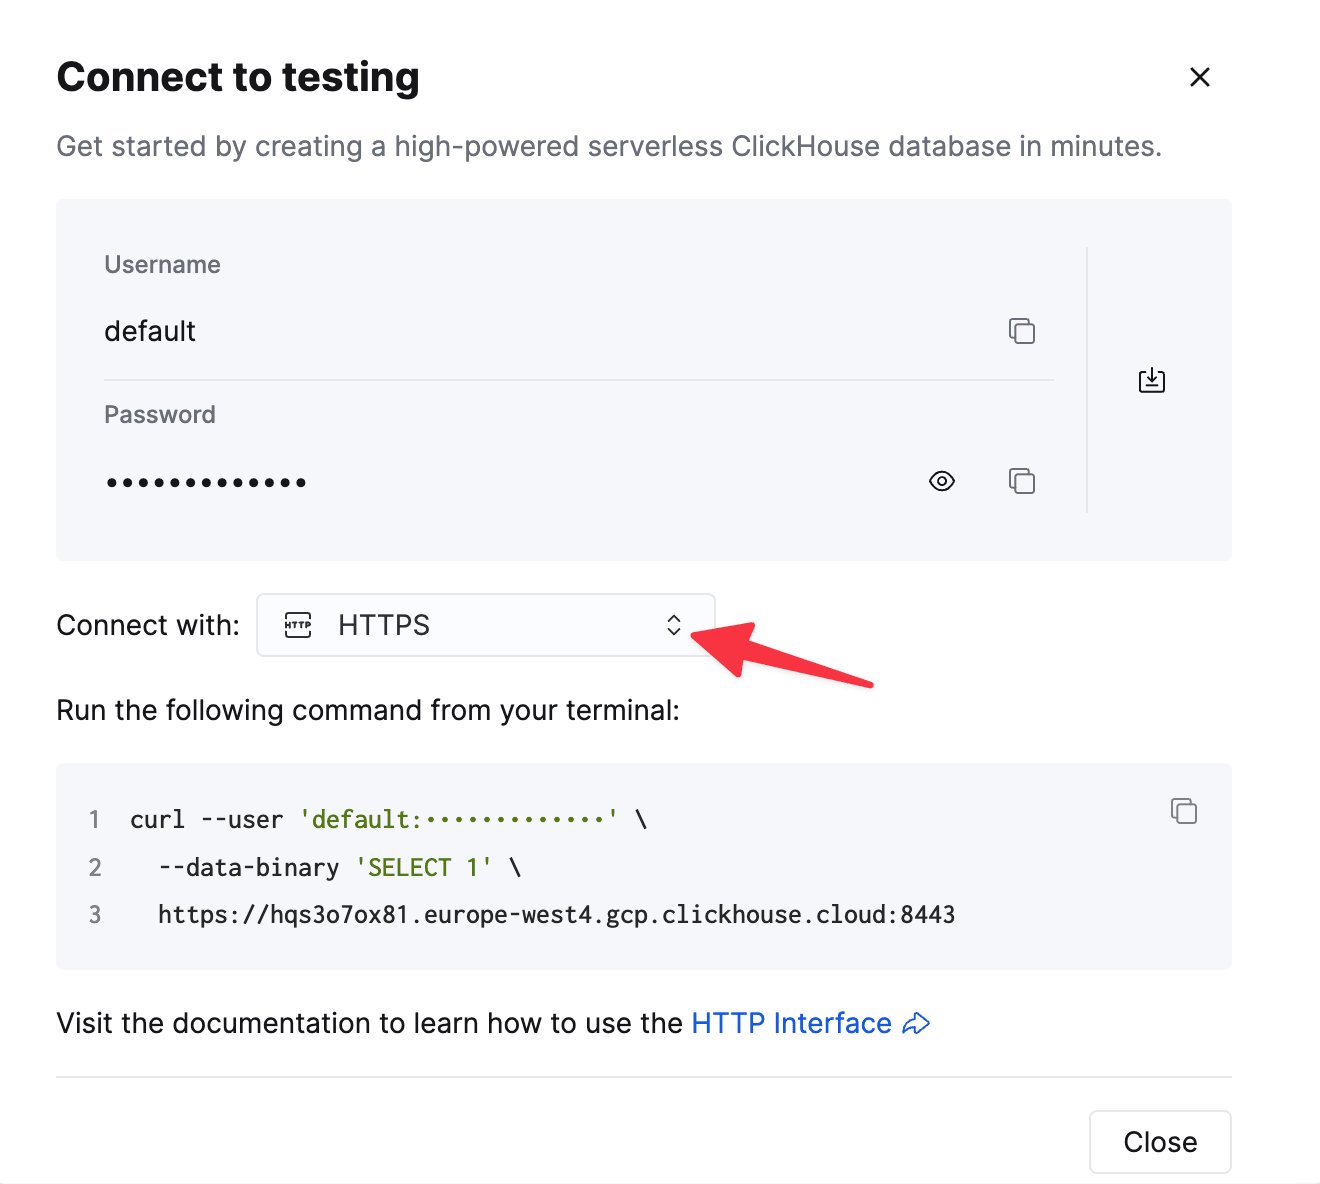
    Choose **HTTPS**. Connection details are displayed in an example `curl` command.

    <div className="ch-image-md">
      <Frame>
        <img src="https://mintcdn.com/private-7c7dfe99-postgresql-tls-support/cTIaEq6k6KYDgBI1/images/_snippets/connection-details-https.webp?fit=max&auto=format&n=cTIaEq6k6KYDgBI1&q=85&s=878b1fe94ea520377426f69503e38994" alt="ClickHouse Cloud HTTPS connection details" width="1320" height="1184" data-path="images/_snippets/connection-details-https.webp" />
      </Frame>
    </div>

    If you're using self-managed ClickHouse, the connection details are set by your ClickHouse administrator.
  </Step>

  <Step title="Download QStudio" id="2-download-qstudio">
    QStudio is available at [https://www.timestored.com/qstudio/download/](https://www.timestored.com/qstudio/download/)
  </Step>

  <Step title="Add a database" id="3-add-a-database">
    * When you first open QStudio click on the menu options **Server->Add Server** or on the add server button on the toolbar.
    * Then set the details:

    <Image img="https://mintcdn.com/private-7c7dfe99-postgresql-tls-support/LZf1zoV79myFHYZi/images/integrations/sql-clients/qstudio-add-connection.webp?fit=max&auto=format&n=LZf1zoV79myFHYZi&q=85&s=043e9c6658fe35c1f888478c01c4ccea" size="lg" border alt="QStudio database connection configuration screen showing ClickHouse connection settings" width="701" height="601" data-path="images/integrations/sql-clients/qstudio-add-connection.webp" />

    1. Server Type: Clickhouse.com
    2. Note for Host you MUST include https\://
       Host: [https://abc.def.clickhouse.cloud](https://abc.def.clickhouse.cloud)
       Port: 8443
    3. Username: default
       Password: `XXXXXXXXXXX`
    4. Click Add

    If QStudio detects that you don't have the ClickHouse JDBC driver installed, it will offer to download them for you:
  </Step>

  <Step title="Query ClickHouse" id="4-query-clickhouse">
    * Open a query editor and run a query. You can run queries by

    * Ctrl + e - Runs highlighted text

    * Ctrl + Enter - Runs the current line

    * An example query:

    <Image img="https://mintcdn.com/private-7c7dfe99-postgresql-tls-support/LZf1zoV79myFHYZi/images/integrations/sql-clients/qstudio-running-query.webp?fit=max&auto=format&n=LZf1zoV79myFHYZi&q=85&s=a25931e52eee6cd834d2add0b35173b9" size="lg" border alt="QStudio interface showing sample SQL query execution against ClickHouse database" width="1283" height="721" data-path="images/integrations/sql-clients/qstudio-running-query.webp" />
  </Step>
</Steps>

<h2 id="next-steps">
  Next steps
</h2>

See [QStudio](https://www.timestored.com/qstudio) to learn about the capabilities of QStudio, and the [ClickHouse documentation](/) to learn about the capabilities of ClickHouse.