> ## Documentation Index
> Fetch the complete documentation index at: https://private-7c7dfe99-postgresql-tls-support.mintlify.site/llms.txt
> Use this file to discover all available pages before exploring further.
> 创建你的第一个 Amazon S3 ClickPipe 的分步指南。
# 创建你的第一个 Amazon S3 ClickPipe
export const Image = ({img, alt, size = "lg"}) => {
const normalizedSize = ["sm", "md", "lg"].includes(size) ? size : "lg";
return

;
};
S3 ClickPipe 提供了一种完全托管且具有弹性的方式,可将 Amazon S3 和兼容 S3 的对象存储中的数据摄取到 ClickHouse Cloud。它支持 **一次性** 和 **持续摄取** 两种模式,并具备精确一次语义。
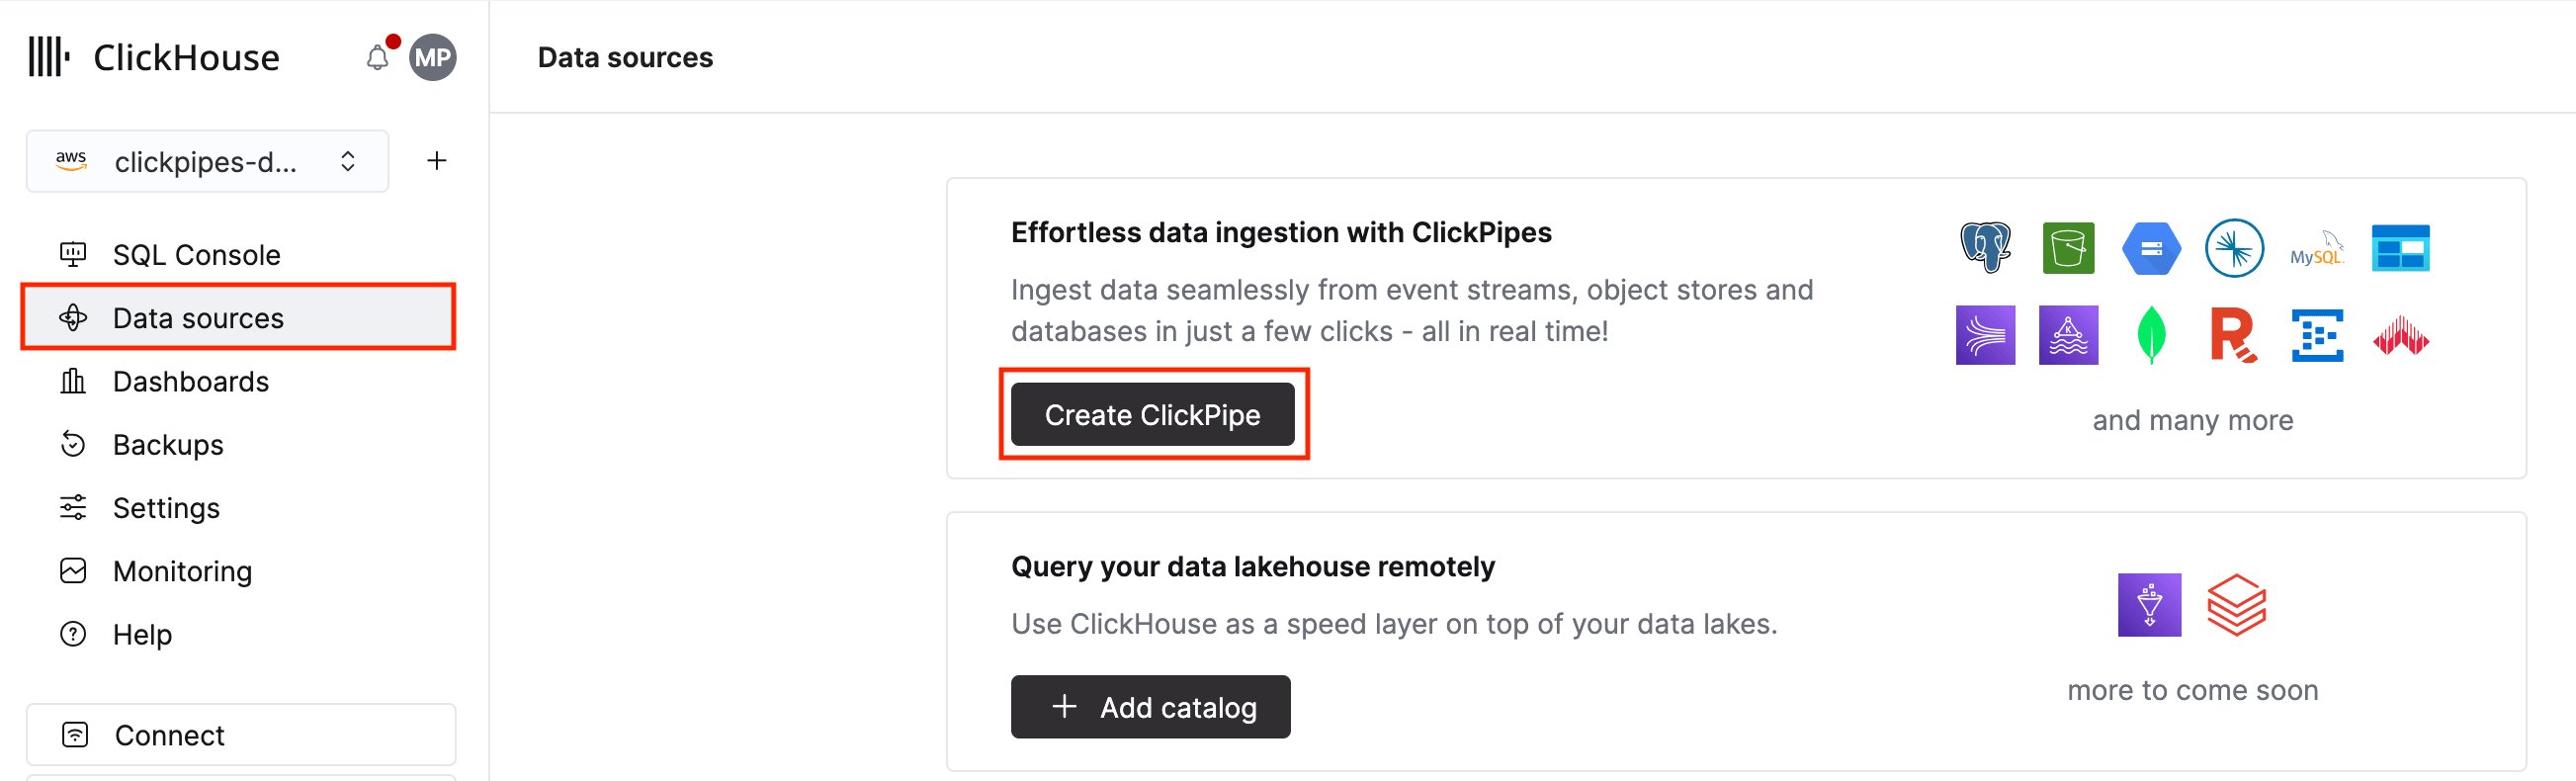
**1.** 在 ClickHouse Cloud 中,从主导航菜单中选择 **数据源**,然后点击 **创建 ClickPipe**。
 **2.** 点击 **Amazon S3** 卡片。你也可以使用此卡片连接 ClickPipes UI 中未列出的其他兼容 S3 的服务。
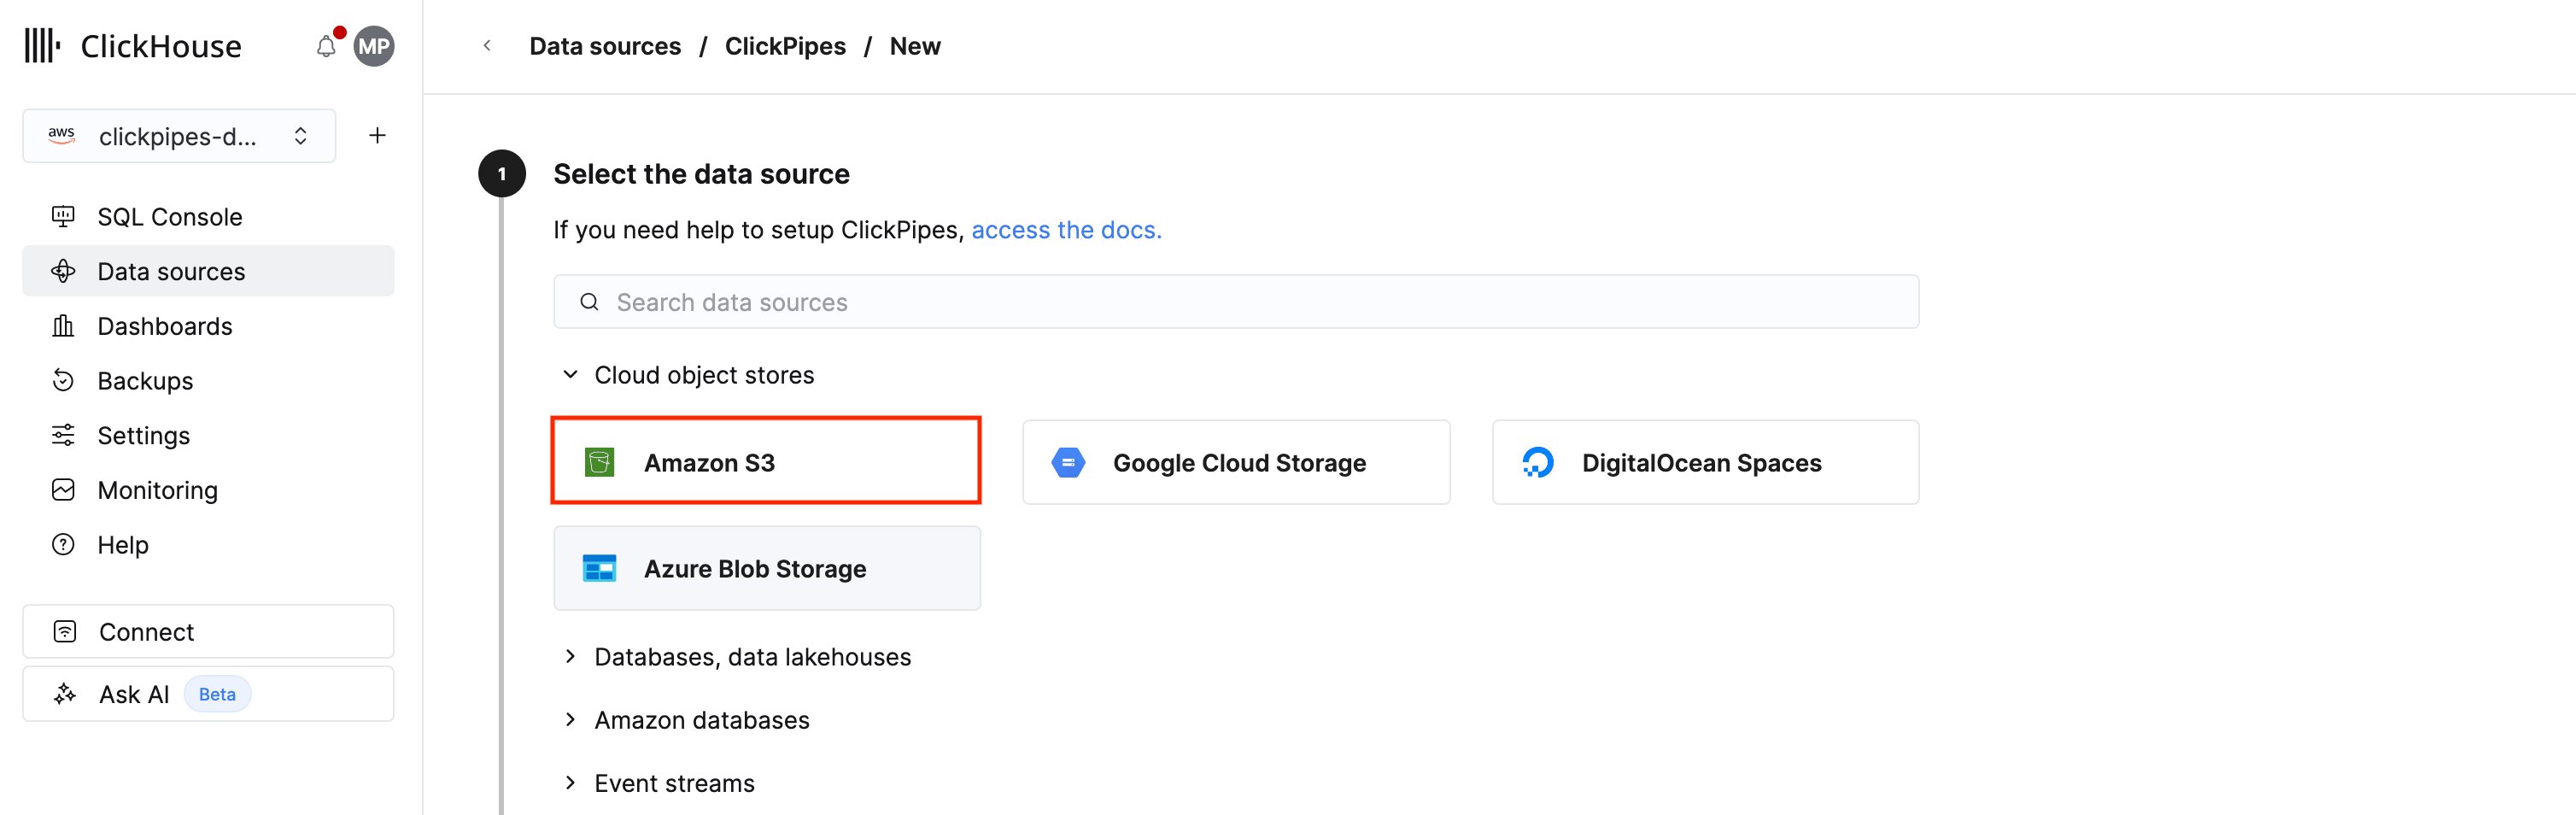 由于不同对象存储服务提供商的 URL 格式和 API 实现存在差异,并非所有兼容 S3 的服务都能开箱即用。如果你在使用某个未列于[受支持的数据源](/zh/integrations/clickpipes/object-storage/amazon-s3/overview#supported-data-sources)中的服务时遇到问题,请[联系团队](https://clickhouse.com/company/contact?loc=clickpipes)。
**1.** 要设置新的 ClickPipe,您需要提供对象存储服务的连接和身份验证详细信息。
由于不同对象存储服务提供商的 URL 格式和 API 实现存在差异,并非所有兼容 S3 的服务都能开箱即用。如果你在使用某个未列于[受支持的数据源](/zh/integrations/clickpipes/object-storage/amazon-s3/overview#supported-data-sources)中的服务时遇到问题,请[联系团队](https://clickhouse.com/company/contact?loc=clickpipes)。
**1.** 要设置新的 ClickPipe,您需要提供对象存储服务的连接和身份验证详细信息。
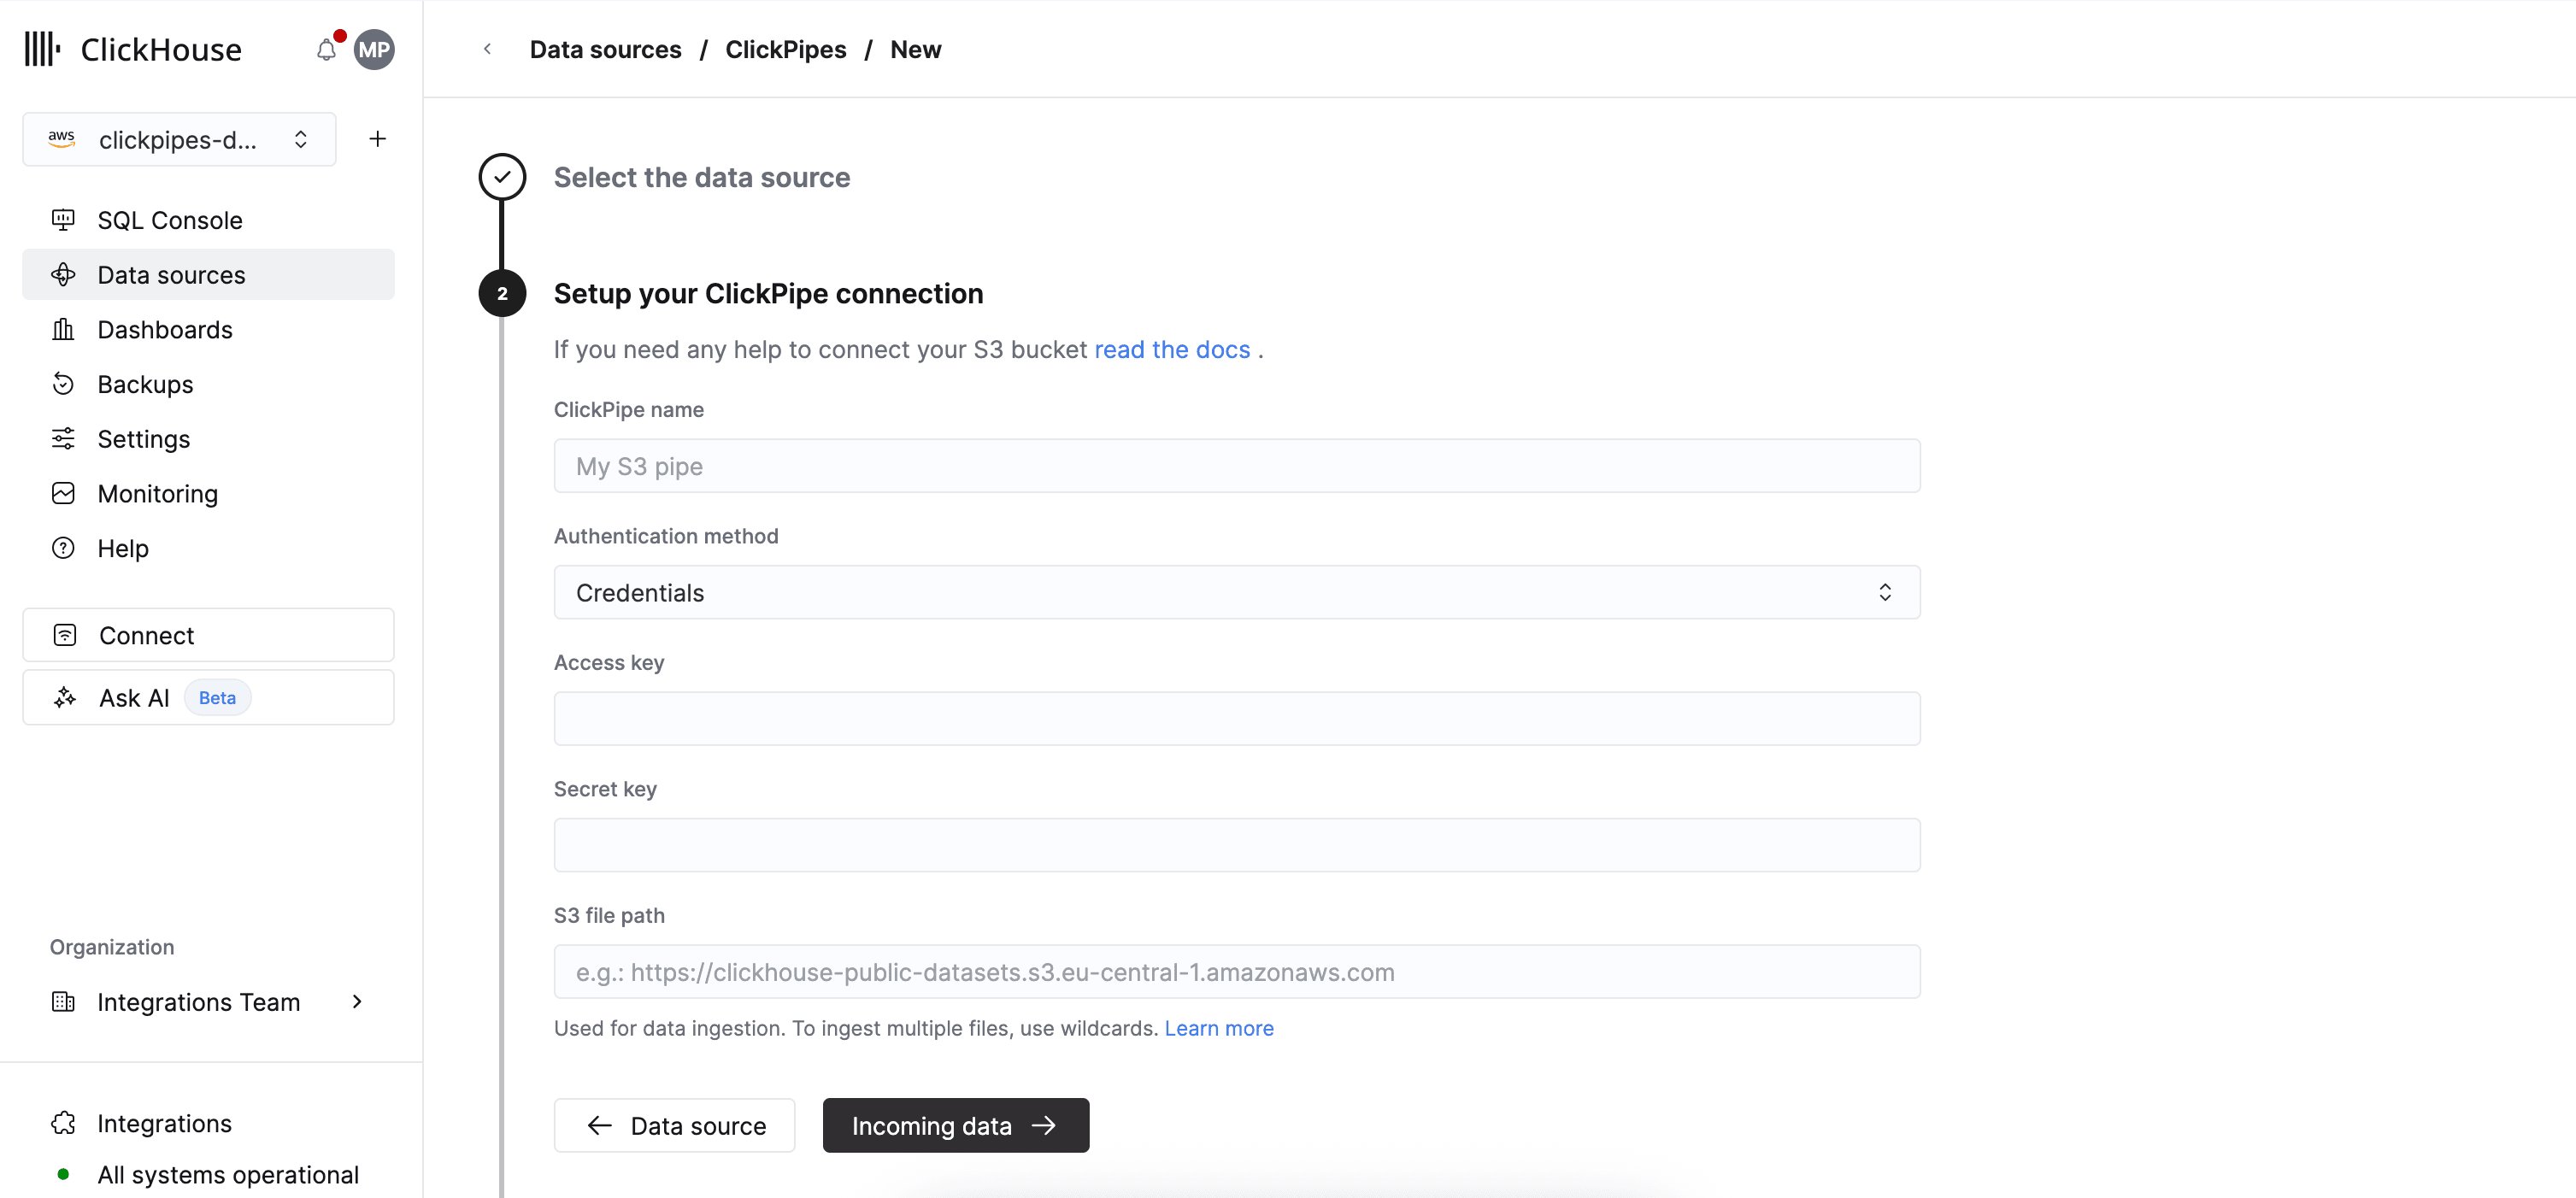 * **身份验证方法**:S3 ClickPipe 支持 [IAM 凭证](/zh/integrations/clickpipes/object-storage/amazon-s3/overview#iam-credentials) (`Credentials`) 和 [基于 IAM role 的身份验证](/zh/integrations/clickpipes/object-storage/amazon-s3/overview#iam-role) (`IAM role`) 。有关身份验证和权限的说明,请参阅[参考文档](/zh/integrations/clickpipes/object-storage/amazon-s3/overview#access-control)。
* **S3 文件路径**:S3 ClickPipe 要求使用 [virtual-hosted-style URI](https://docs.aws.amazon.com/AmazonS3/latest/userguide/VirtualHosting.html#virtual-hosted-style-access)。
```bash theme={null}
https://bucket-name.s3.region-code.amazonaws.com/key-name
```
您可以使用 POSIX 通配符来匹配多个文件或前缀。有关支持的匹配模式,请参阅[参考文档](/zh/integrations/clickpipes/object-storage/amazon-s3/overview#file-pattern-matching)。
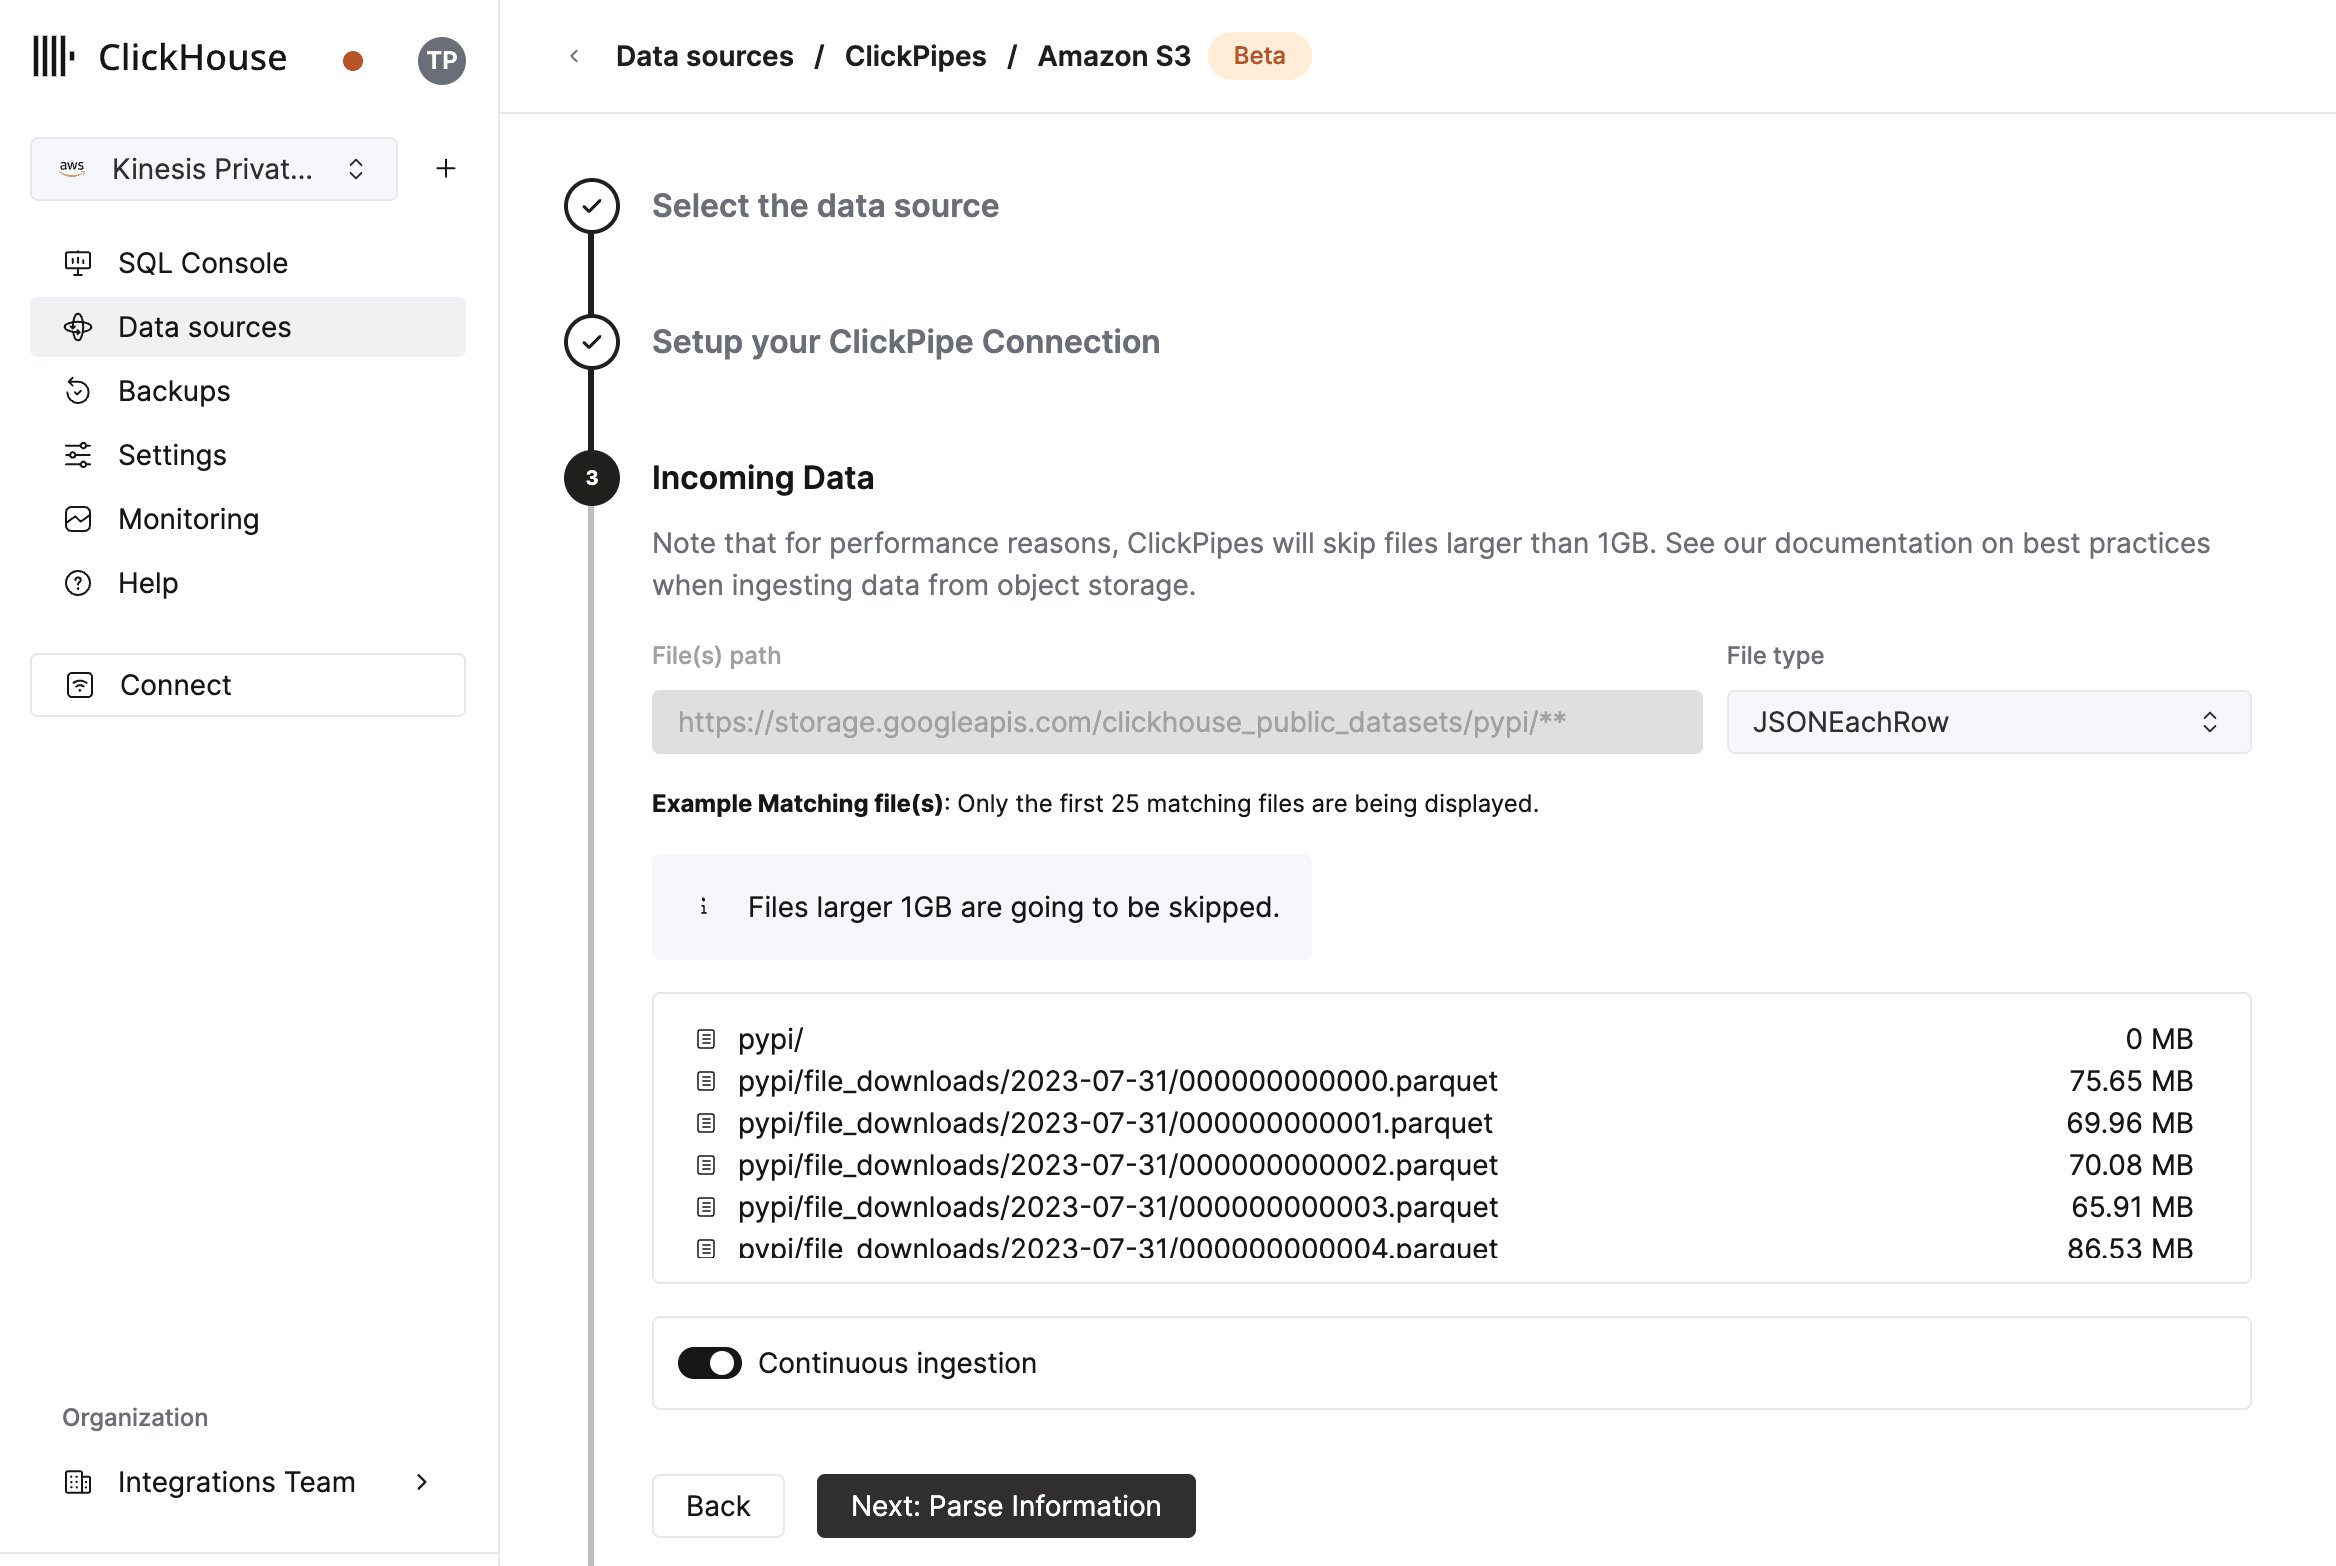
**2.** 点击 **传入数据**。ClickPipes 会从您的存储桶中拉取元数据,用于下一步。
界面将显示指定 bucket 中的文件列表。
选择数据格式 (目前支持部分 ClickHouse 格式) ,并决定是否启用持续摄取。
更多详细信息,请参阅概览页面中的“持续摄取”部分。
* **身份验证方法**:S3 ClickPipe 支持 [IAM 凭证](/zh/integrations/clickpipes/object-storage/amazon-s3/overview#iam-credentials) (`Credentials`) 和 [基于 IAM role 的身份验证](/zh/integrations/clickpipes/object-storage/amazon-s3/overview#iam-role) (`IAM role`) 。有关身份验证和权限的说明,请参阅[参考文档](/zh/integrations/clickpipes/object-storage/amazon-s3/overview#access-control)。
* **S3 文件路径**:S3 ClickPipe 要求使用 [virtual-hosted-style URI](https://docs.aws.amazon.com/AmazonS3/latest/userguide/VirtualHosting.html#virtual-hosted-style-access)。
```bash theme={null}
https://bucket-name.s3.region-code.amazonaws.com/key-name
```
您可以使用 POSIX 通配符来匹配多个文件或前缀。有关支持的匹配模式,请参阅[参考文档](/zh/integrations/clickpipes/object-storage/amazon-s3/overview#file-pattern-matching)。
**2.** 点击 **传入数据**。ClickPipes 会从您的存储桶中拉取元数据,用于下一步。
界面将显示指定 bucket 中的文件列表。
选择数据格式 (目前支持部分 ClickHouse 格式) ,并决定是否启用持续摄取。
更多详细信息,请参阅概览页面中的“持续摄取”部分。
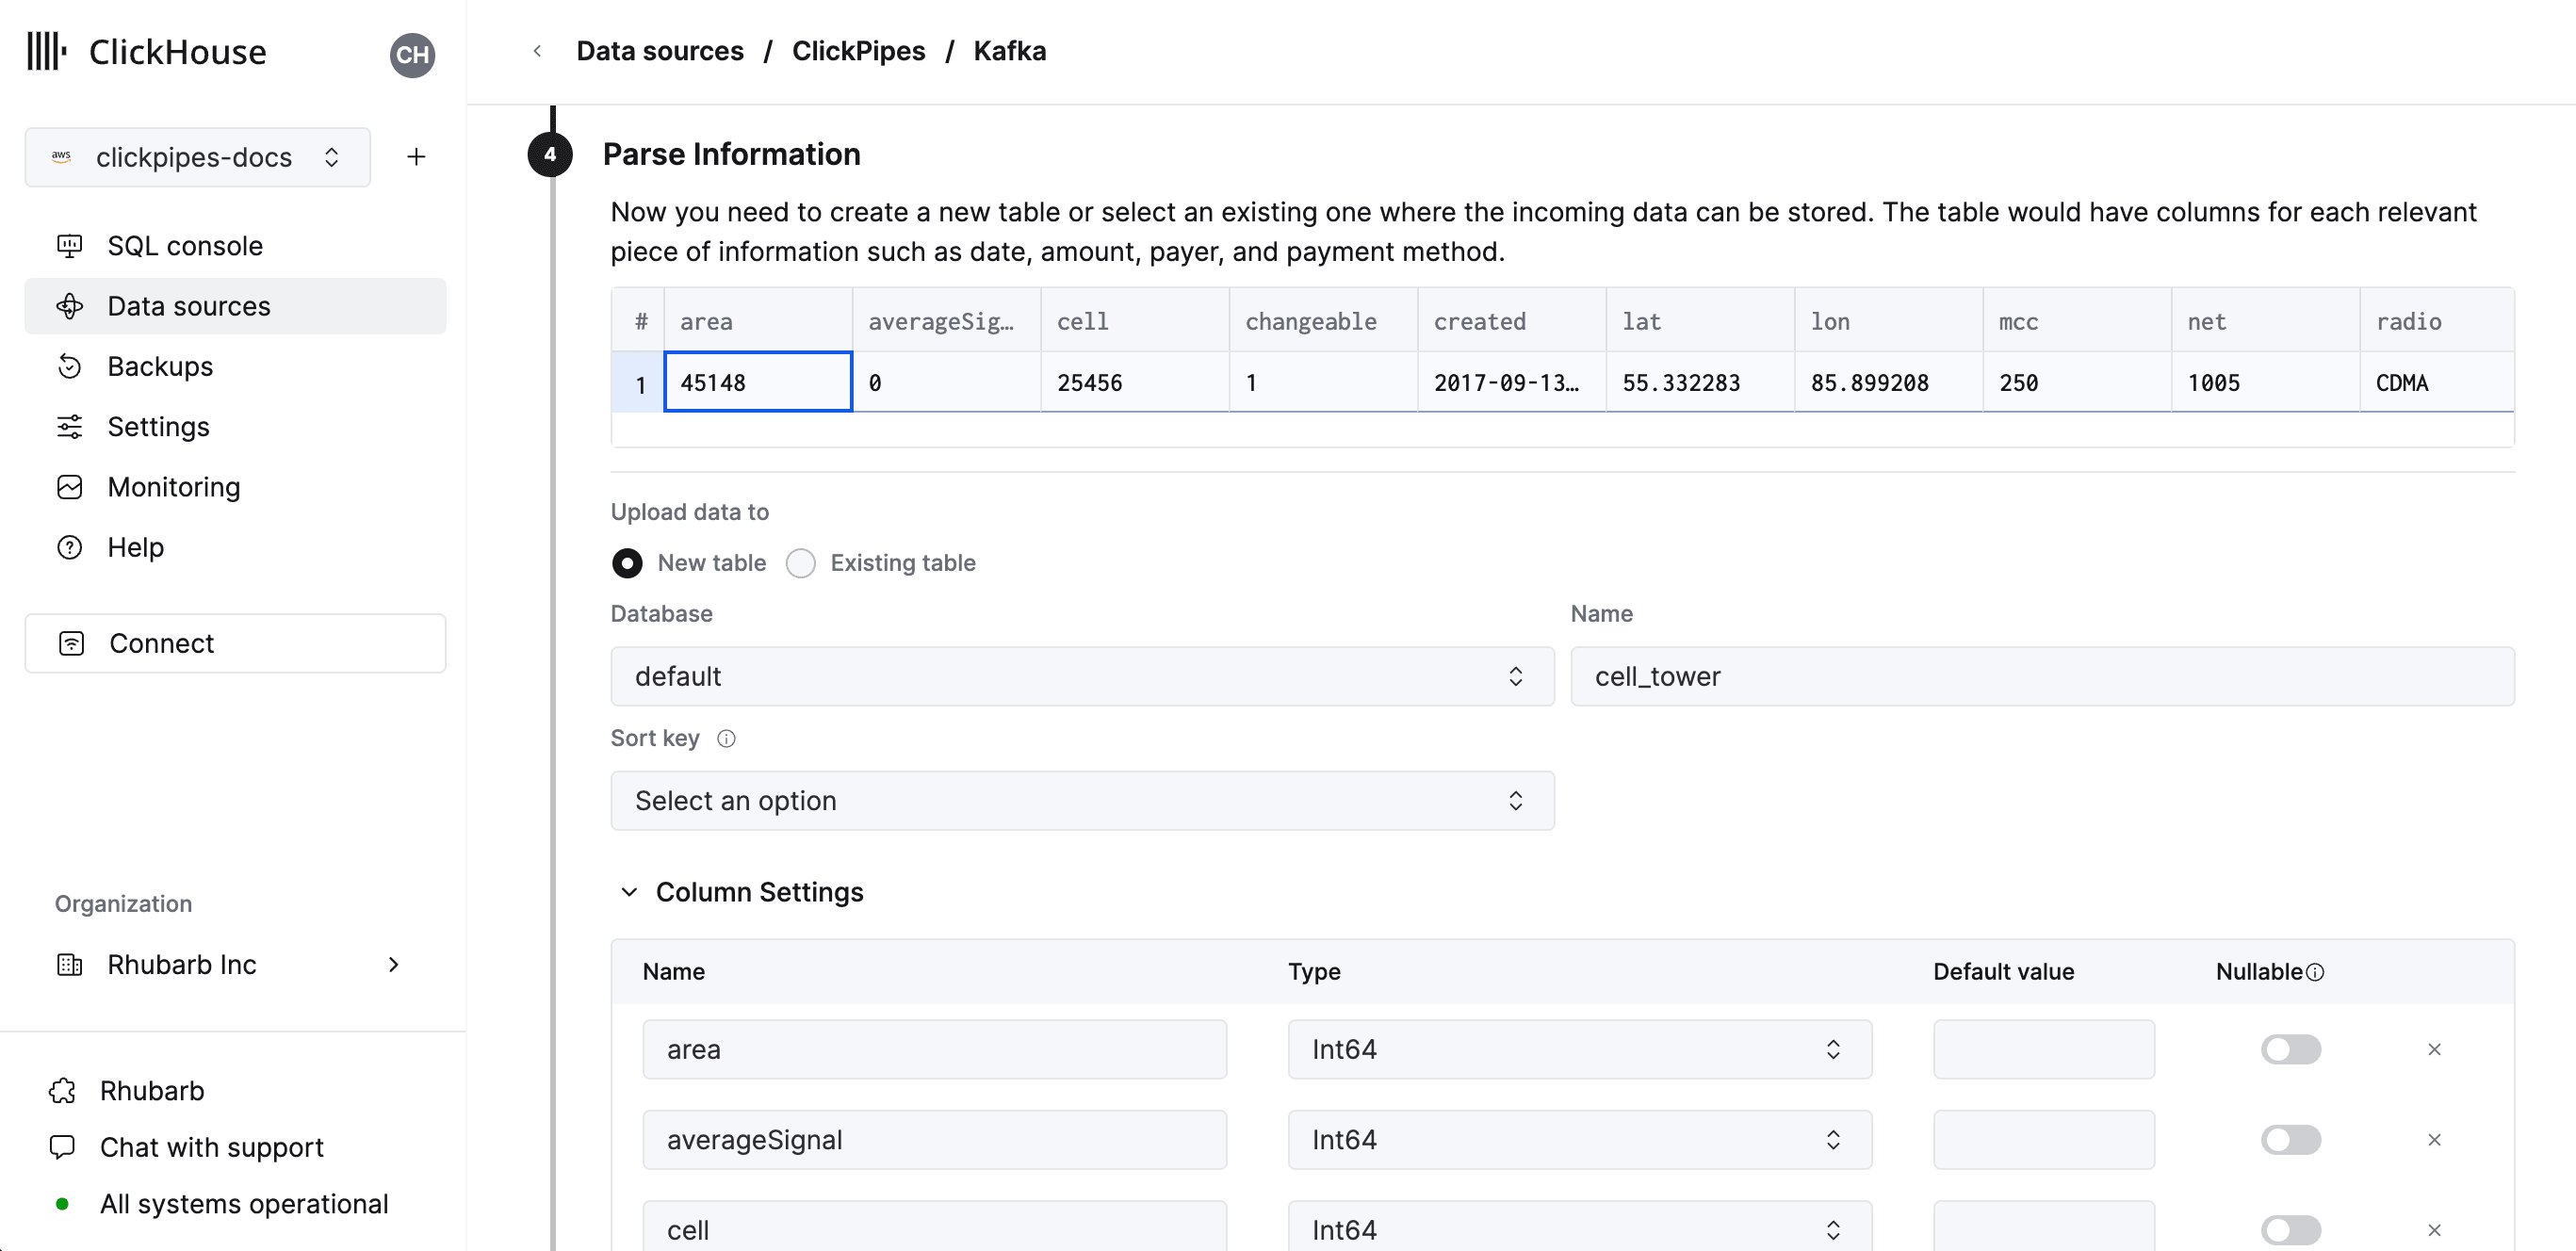
 在下一步中,您可以选择将数据摄取到新的 ClickHouse 表中,或复用现有表。
按照界面上的说明修改表名、schema 和设置。
您可以在顶部的样本表中实时预览这些更改。
在下一步中,您可以选择将数据摄取到新的 ClickHouse 表中,或复用现有表。
按照界面上的说明修改表名、schema 和设置。
您可以在顶部的样本表中实时预览这些更改。
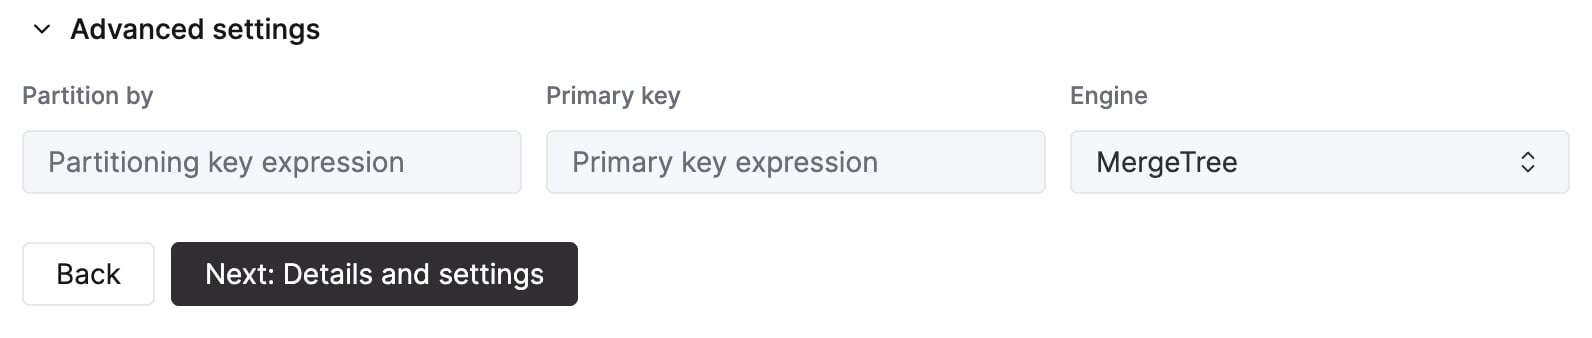
 您还可以使用提供的控件自定义高级设置。
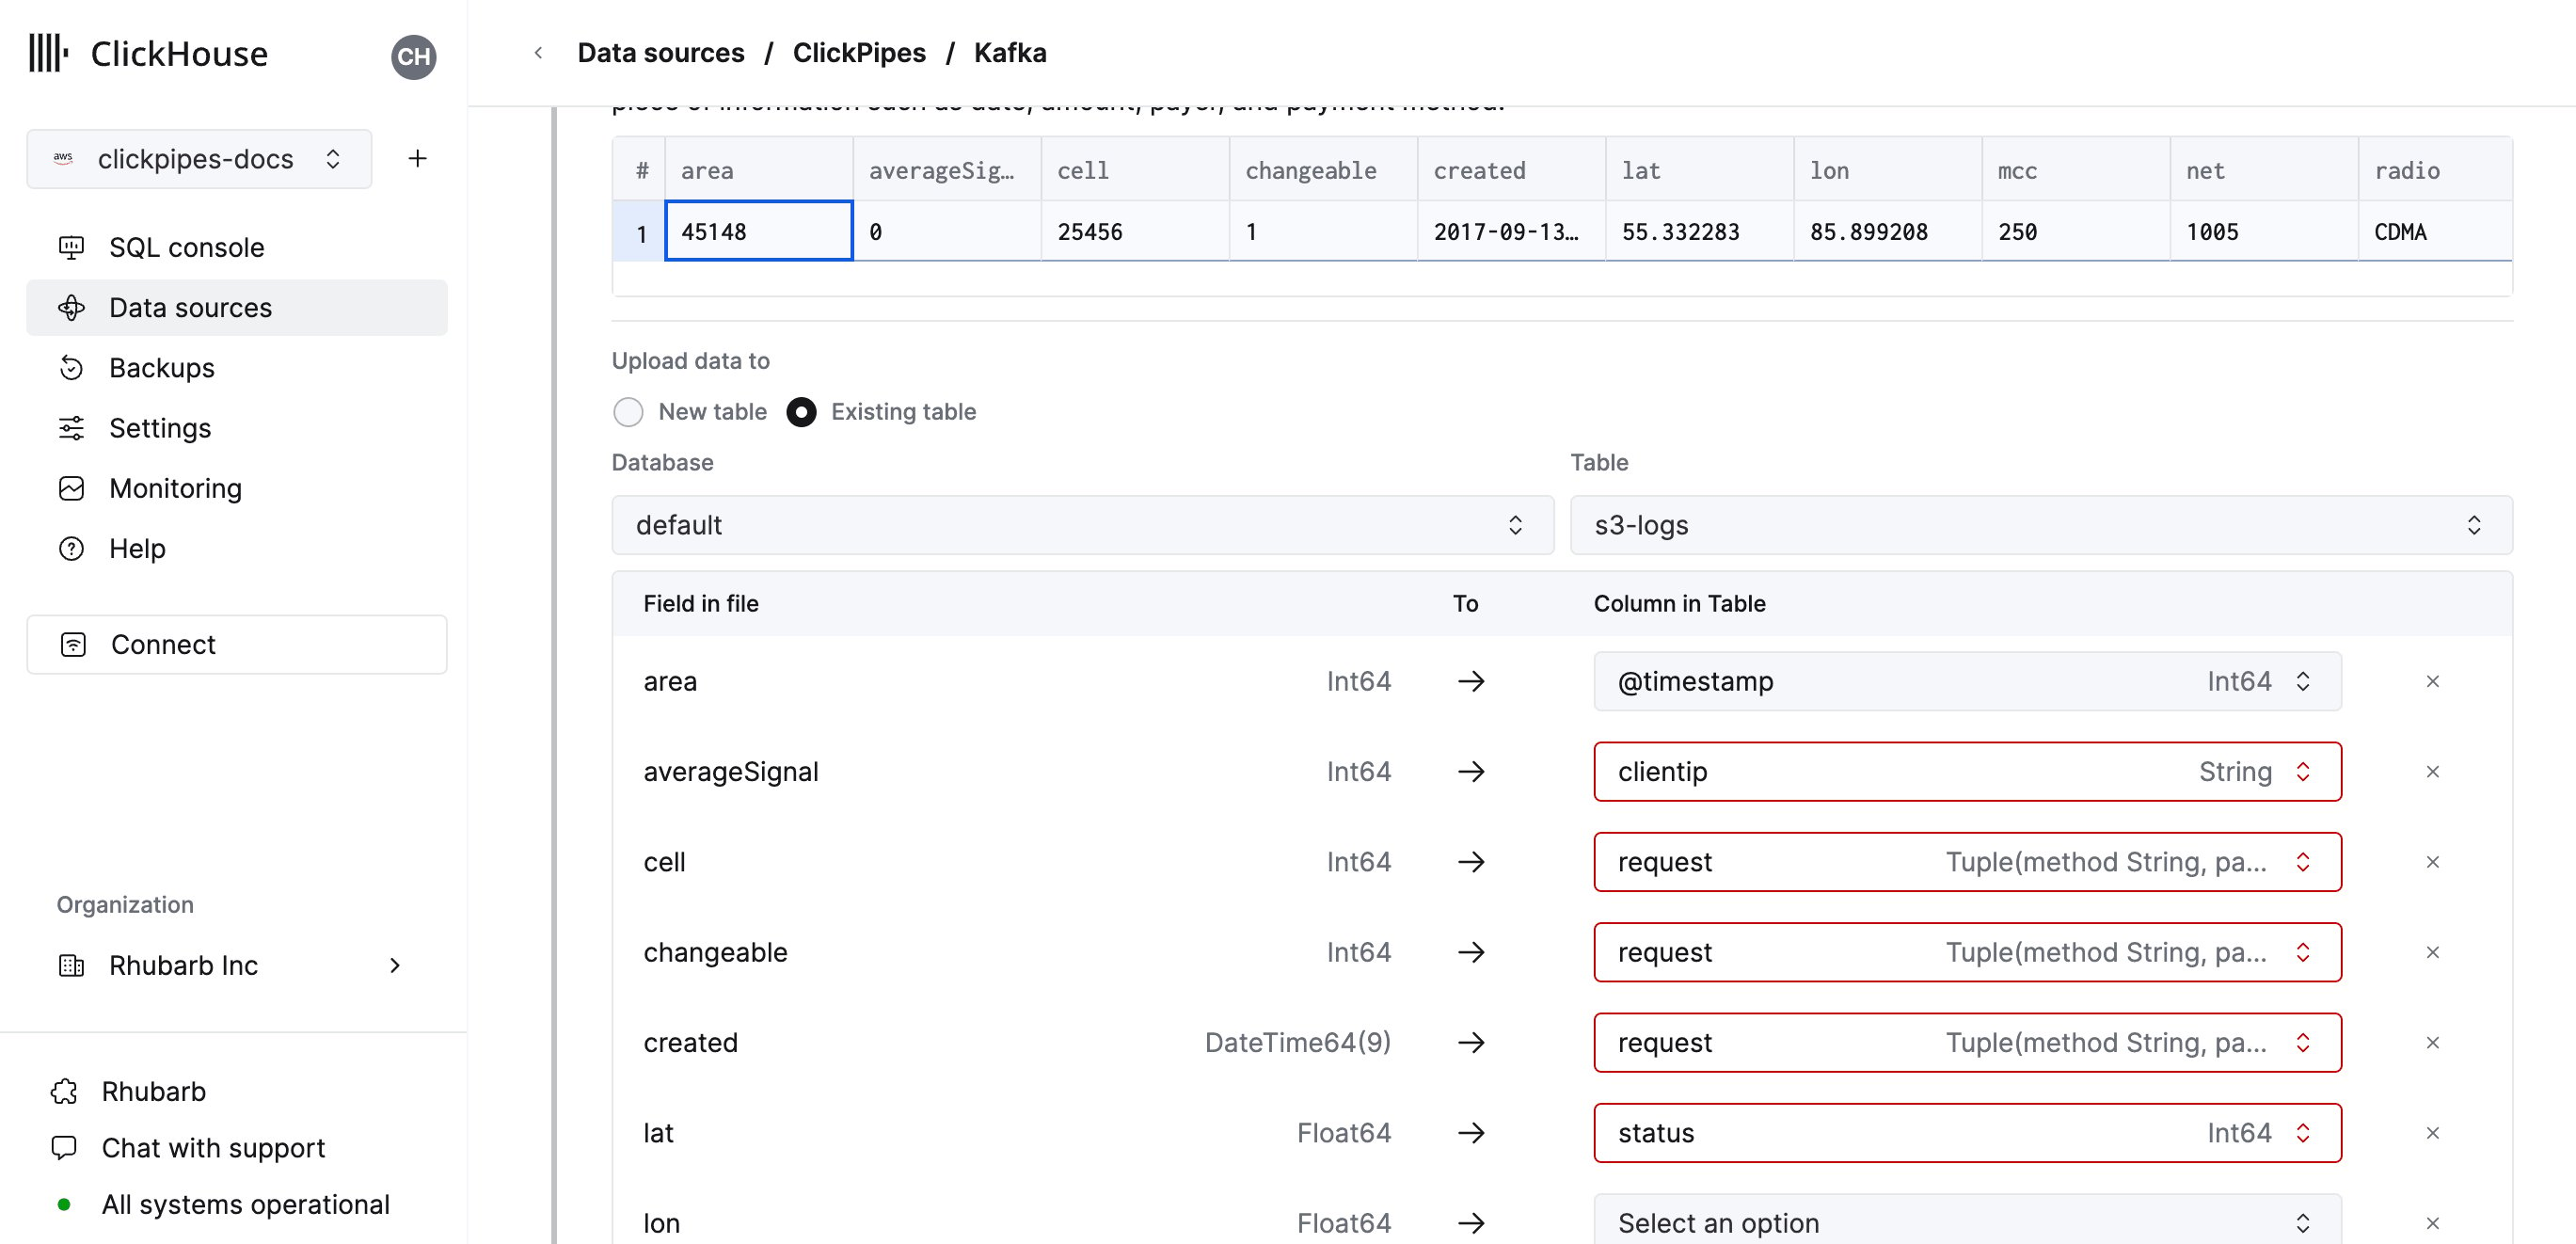
 或者,您也可以选择将数据摄取到现有的 ClickHouse 表中。
在这种情况下,界面会允许您将源字段映射到所选目标表中的 ClickHouse 字段。
或者,您也可以选择将数据摄取到现有的 ClickHouse 表中。
在这种情况下,界面会允许您将源字段映射到所选目标表中的 ClickHouse 字段。
 您还可以将[虚拟列](/zh/reference/functions/table-functions/s3#virtual-columns) (如 `_path` 或 `_size`) 映射到字段。
最后,您可以为内部 ClickPipes 用户配置权限。
**权限:** ClickPipes 会创建一个专用用户,用于将数据写入目标表。您可以为该内部用户选择角色,可使用自定义角色或预定义角色之一:
* `Full access`:拥有整个 cluster 的完全访问权限。如果目标表使用了 materialized view 或 字典,则需要选择此项。
* `Only destination table`:仅拥有目标表的 `INSERT` 权限。
您还可以将[虚拟列](/zh/reference/functions/table-functions/s3#virtual-columns) (如 `_path` 或 `_size`) 映射到字段。
最后,您可以为内部 ClickPipes 用户配置权限。
**权限:** ClickPipes 会创建一个专用用户,用于将数据写入目标表。您可以为该内部用户选择角色,可使用自定义角色或预定义角色之一:
* `Full access`:拥有整个 cluster 的完全访问权限。如果目标表使用了 materialized view 或 字典,则需要选择此项。
* `Only destination table`:仅拥有目标表的 `INSERT` 权限。
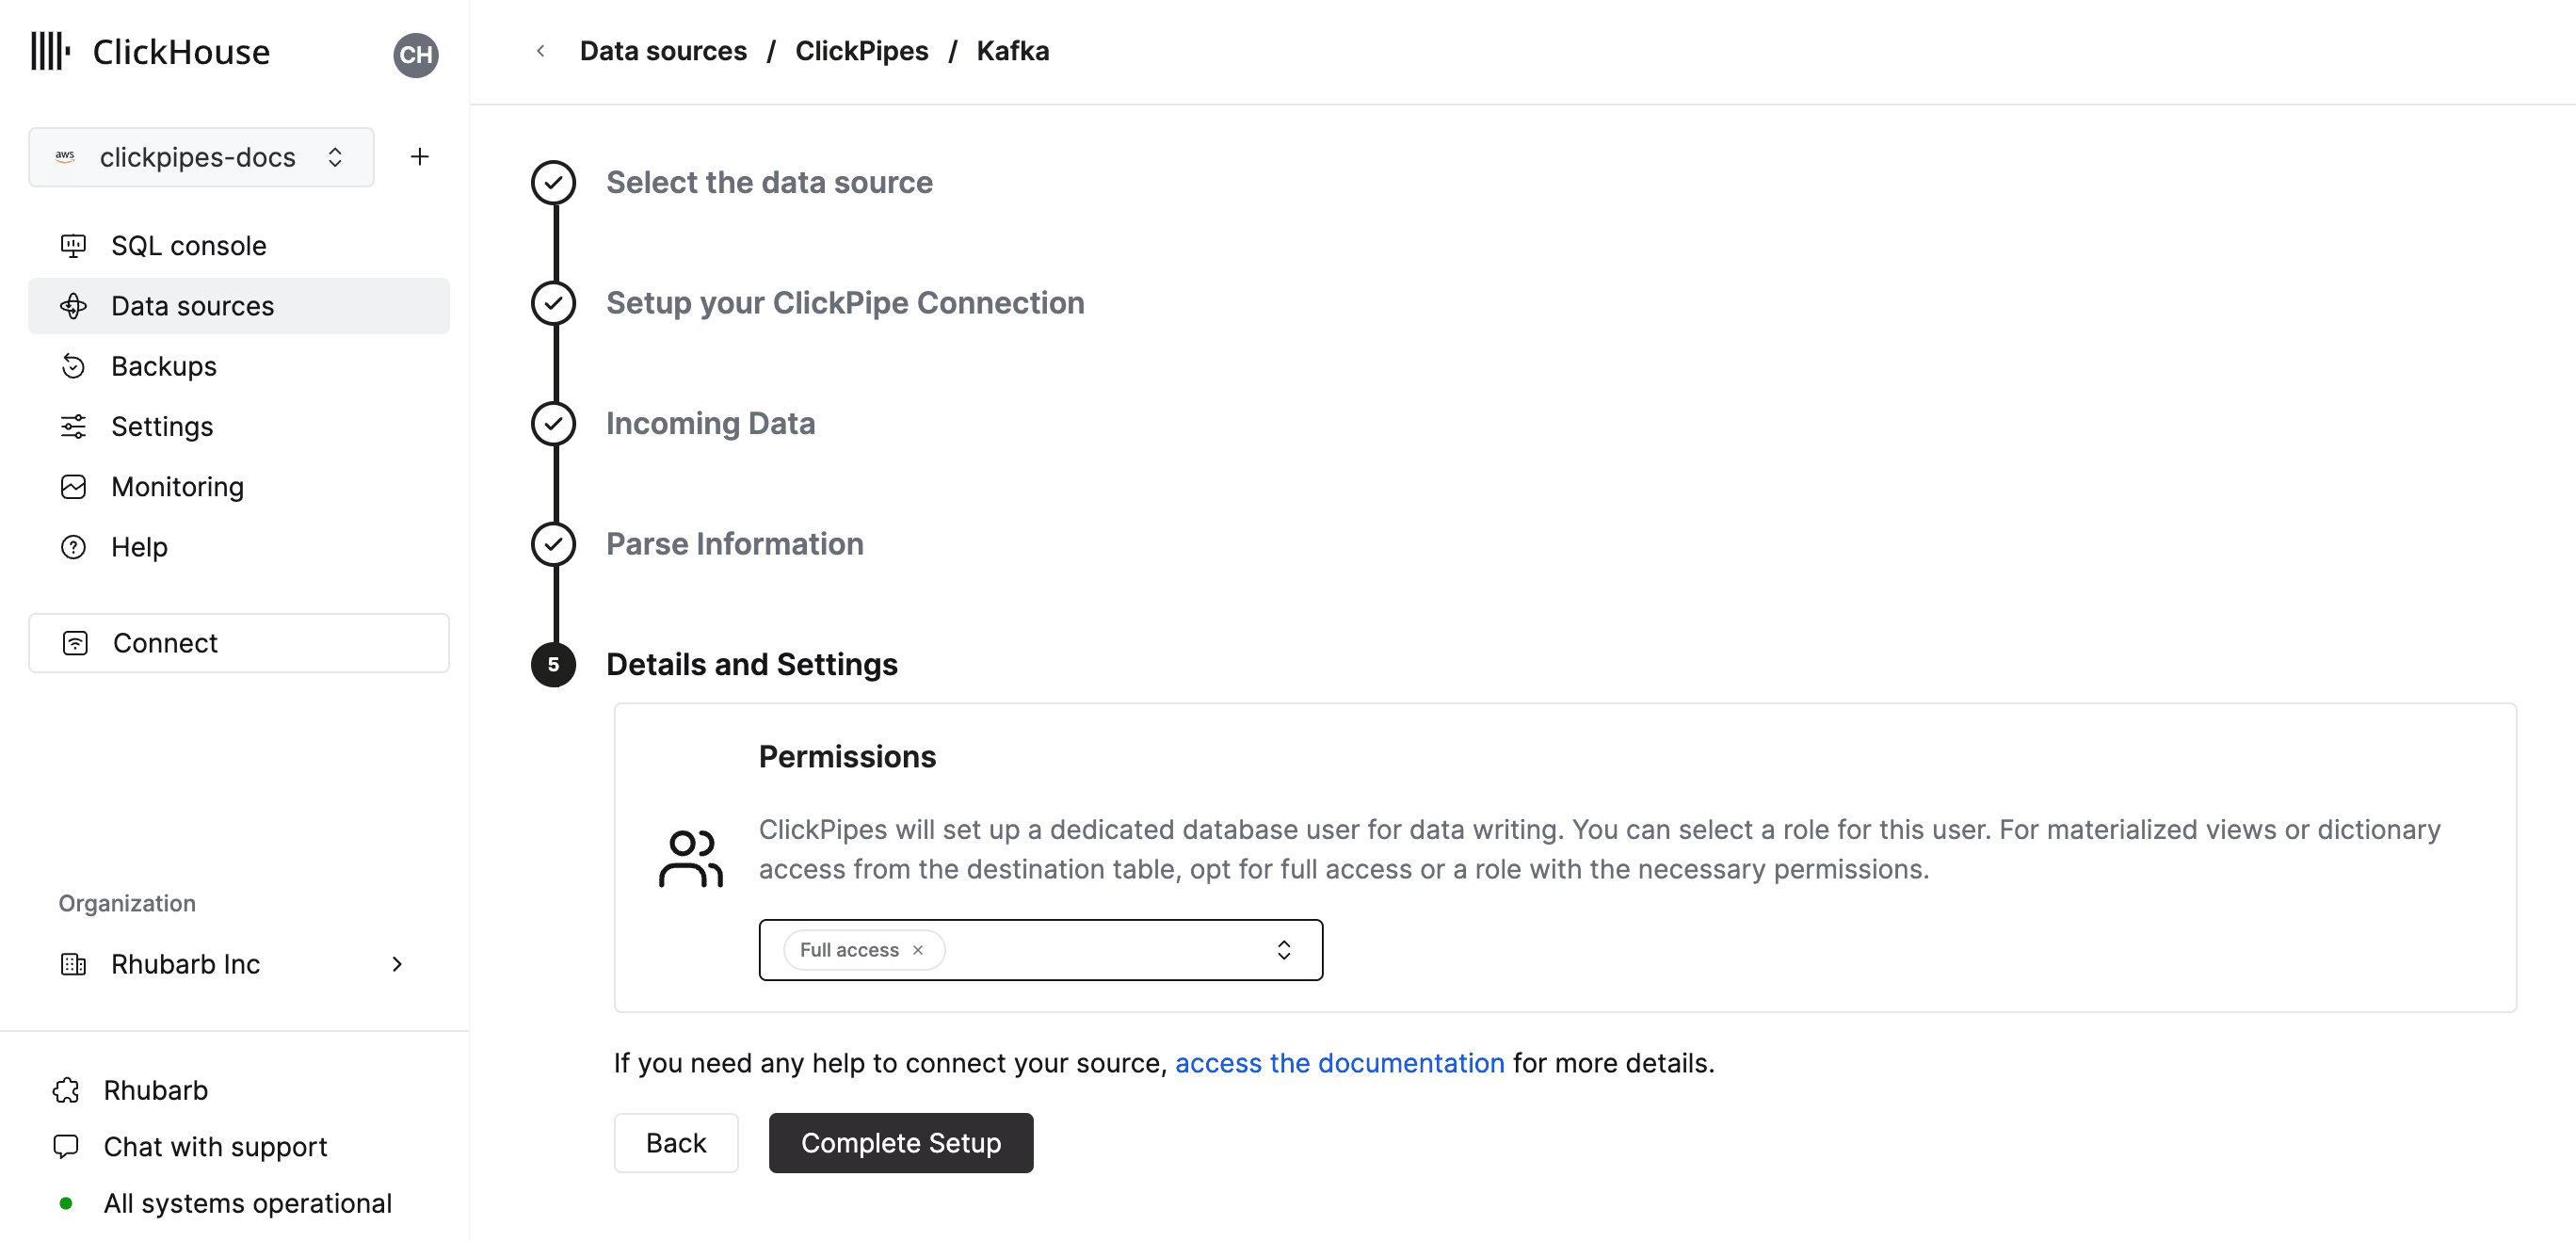 点击“Complete Setup”后,系统将注册您的 ClickPipe,随后您可以在摘要表中看到它。
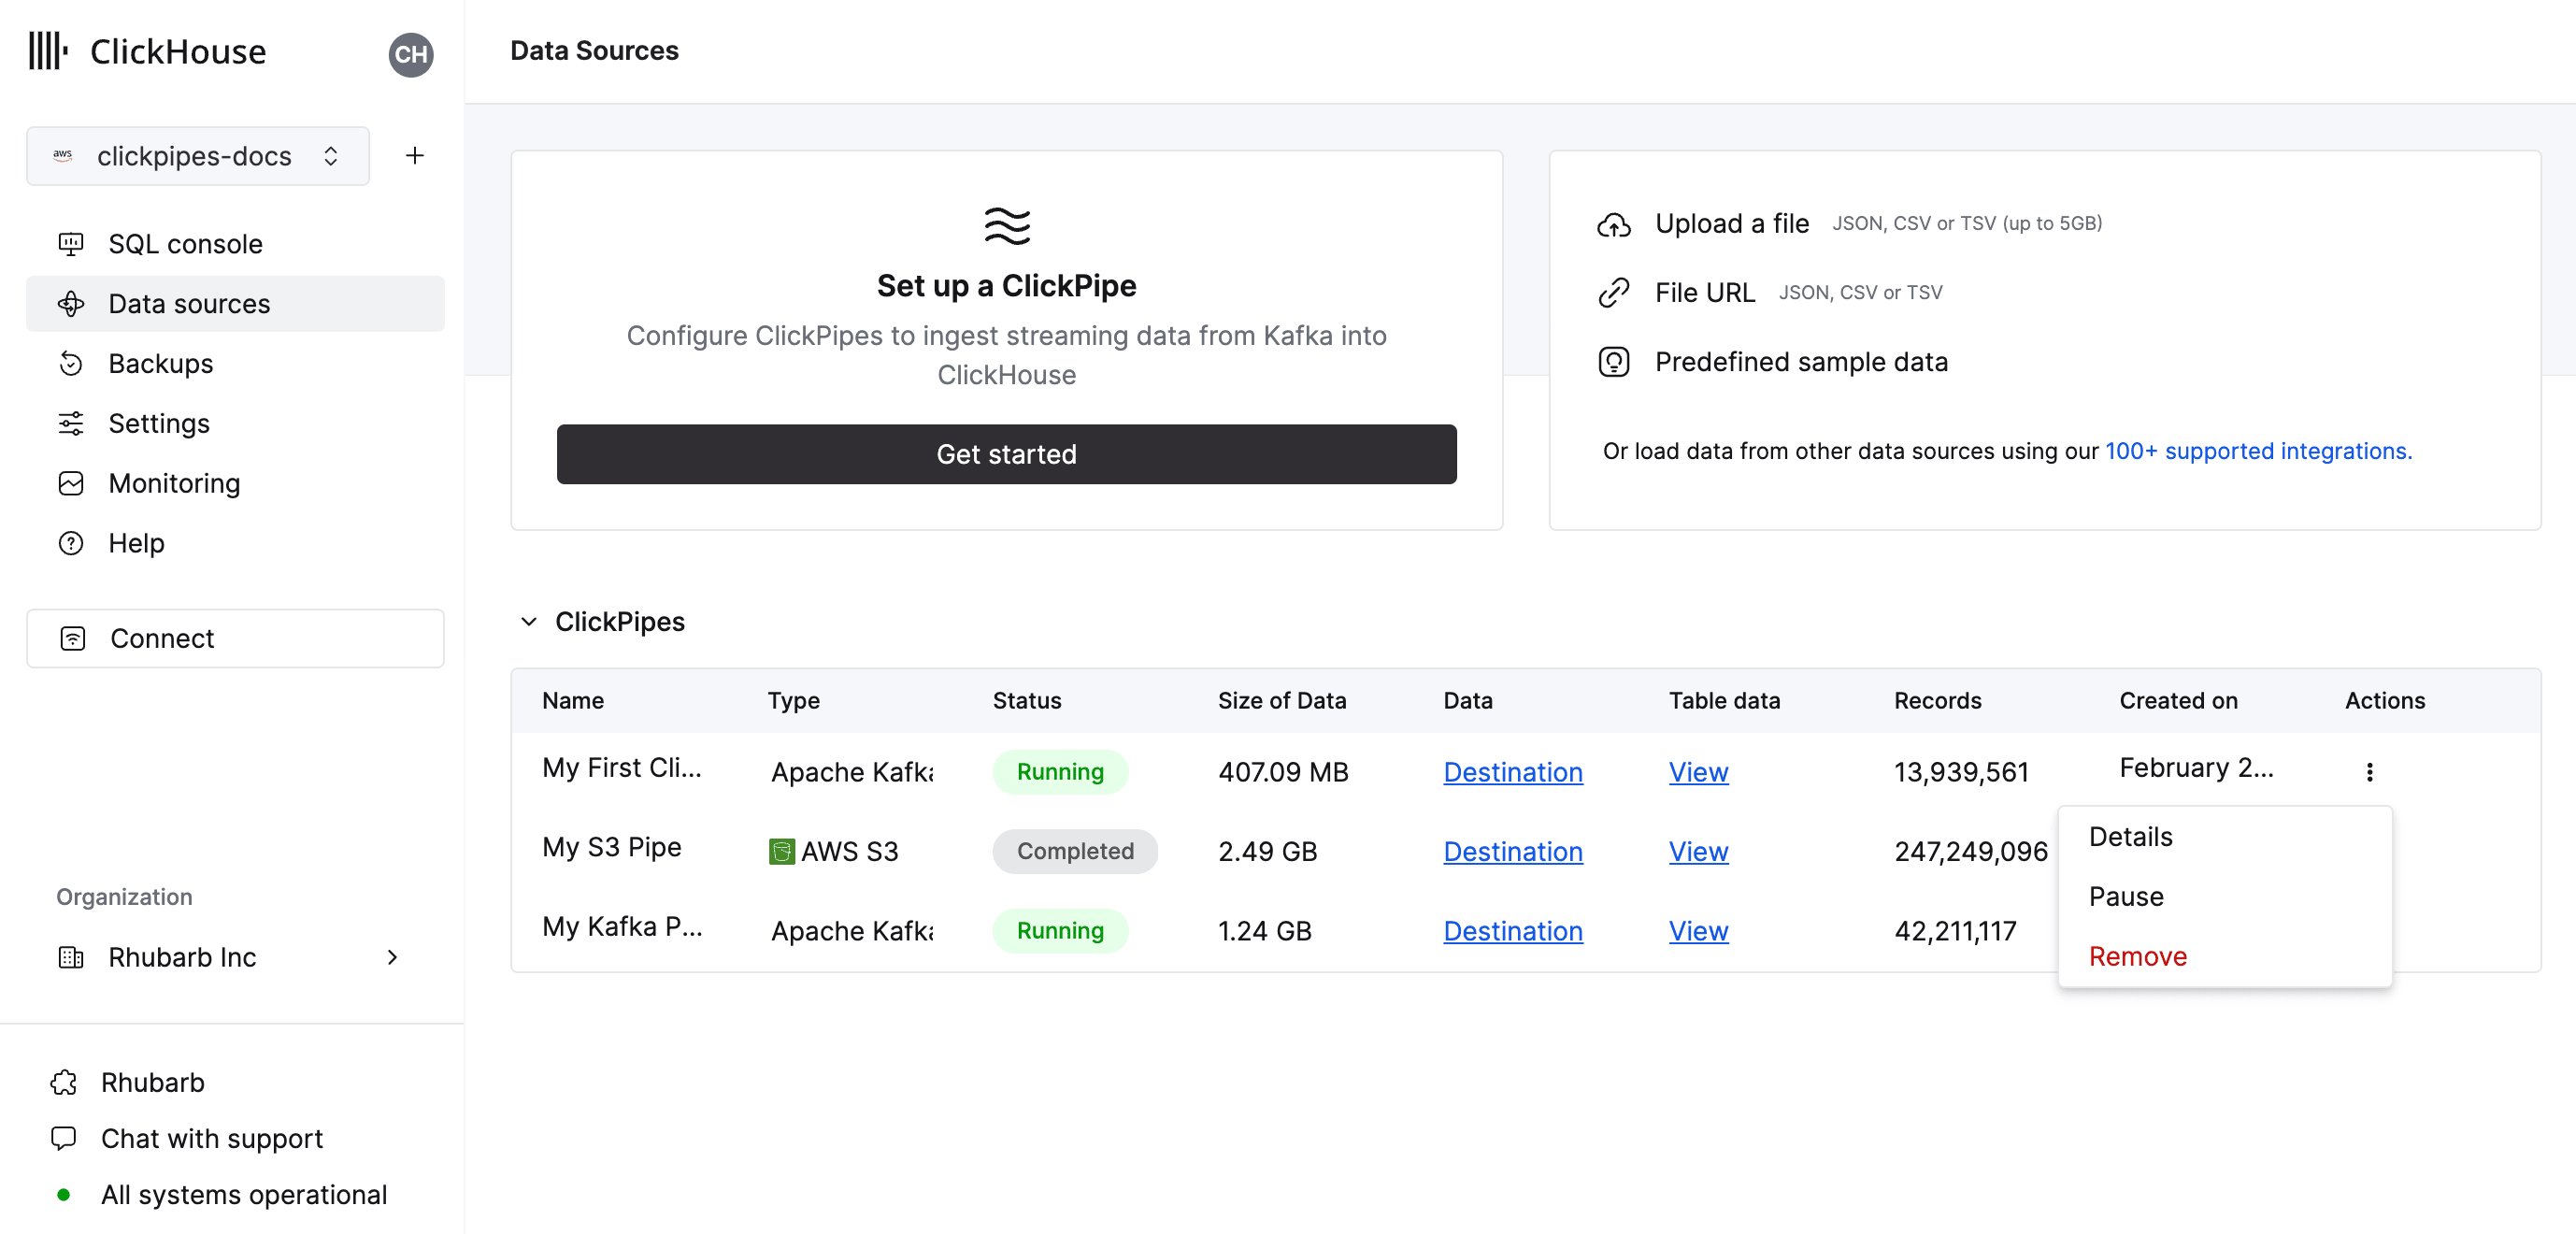 摘要表提供了相关控件,可用于显示源中的样本数据,或显示 ClickHouse 中目标表的数据。
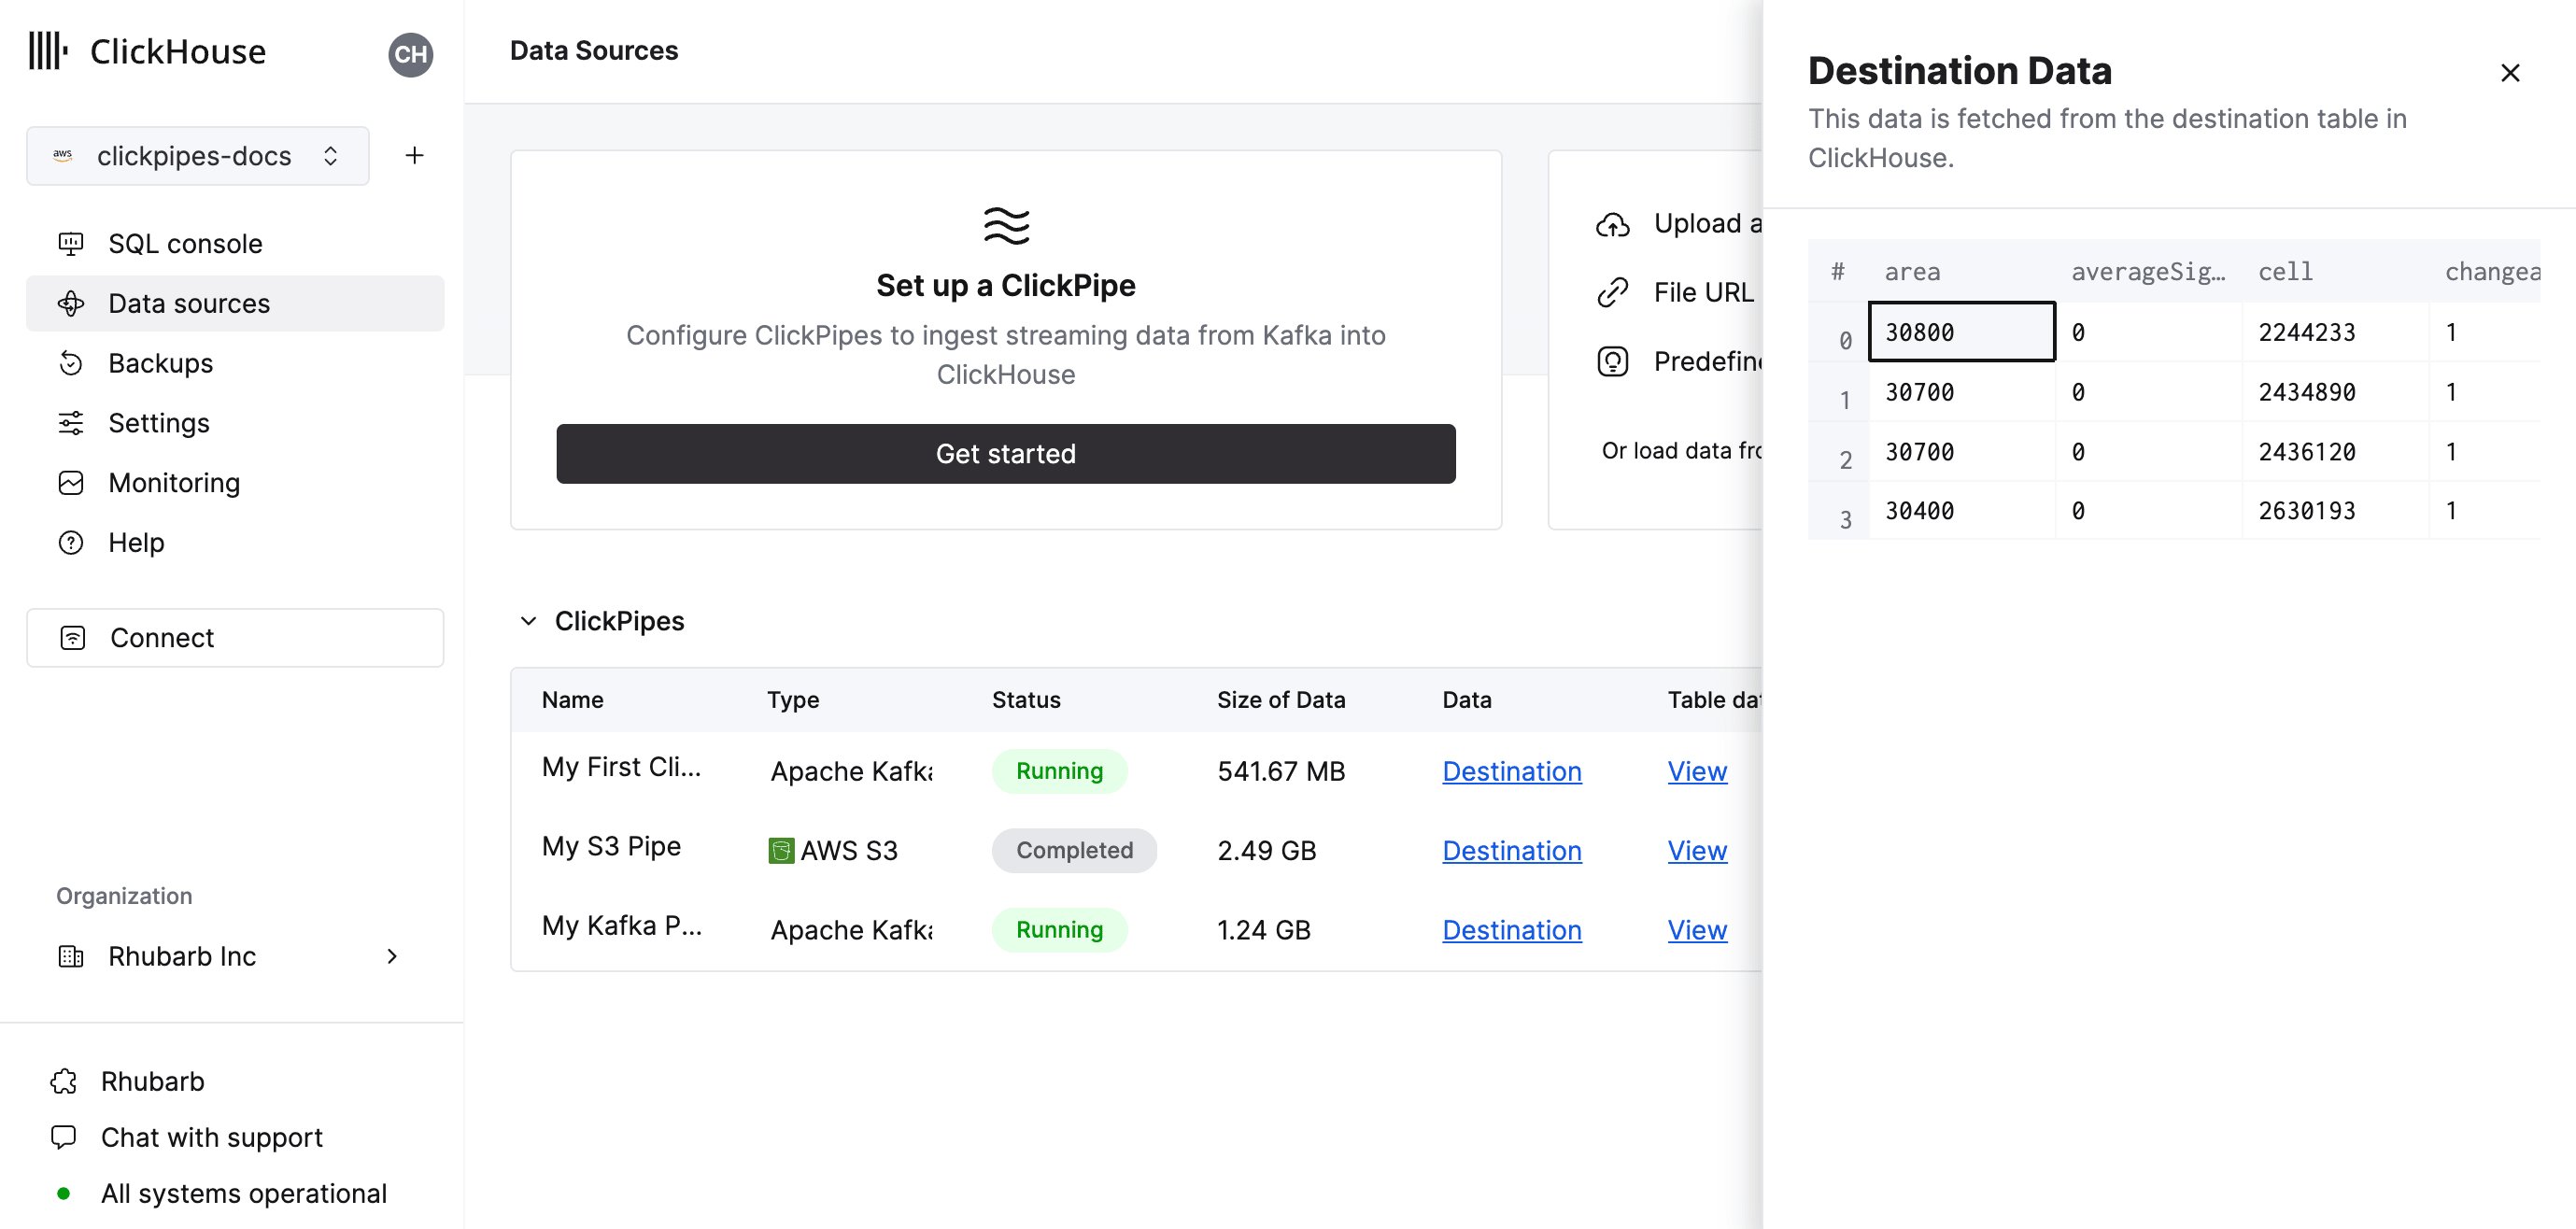 以及用于删除 ClickPipe 并显示摄取作业摘要的控件。
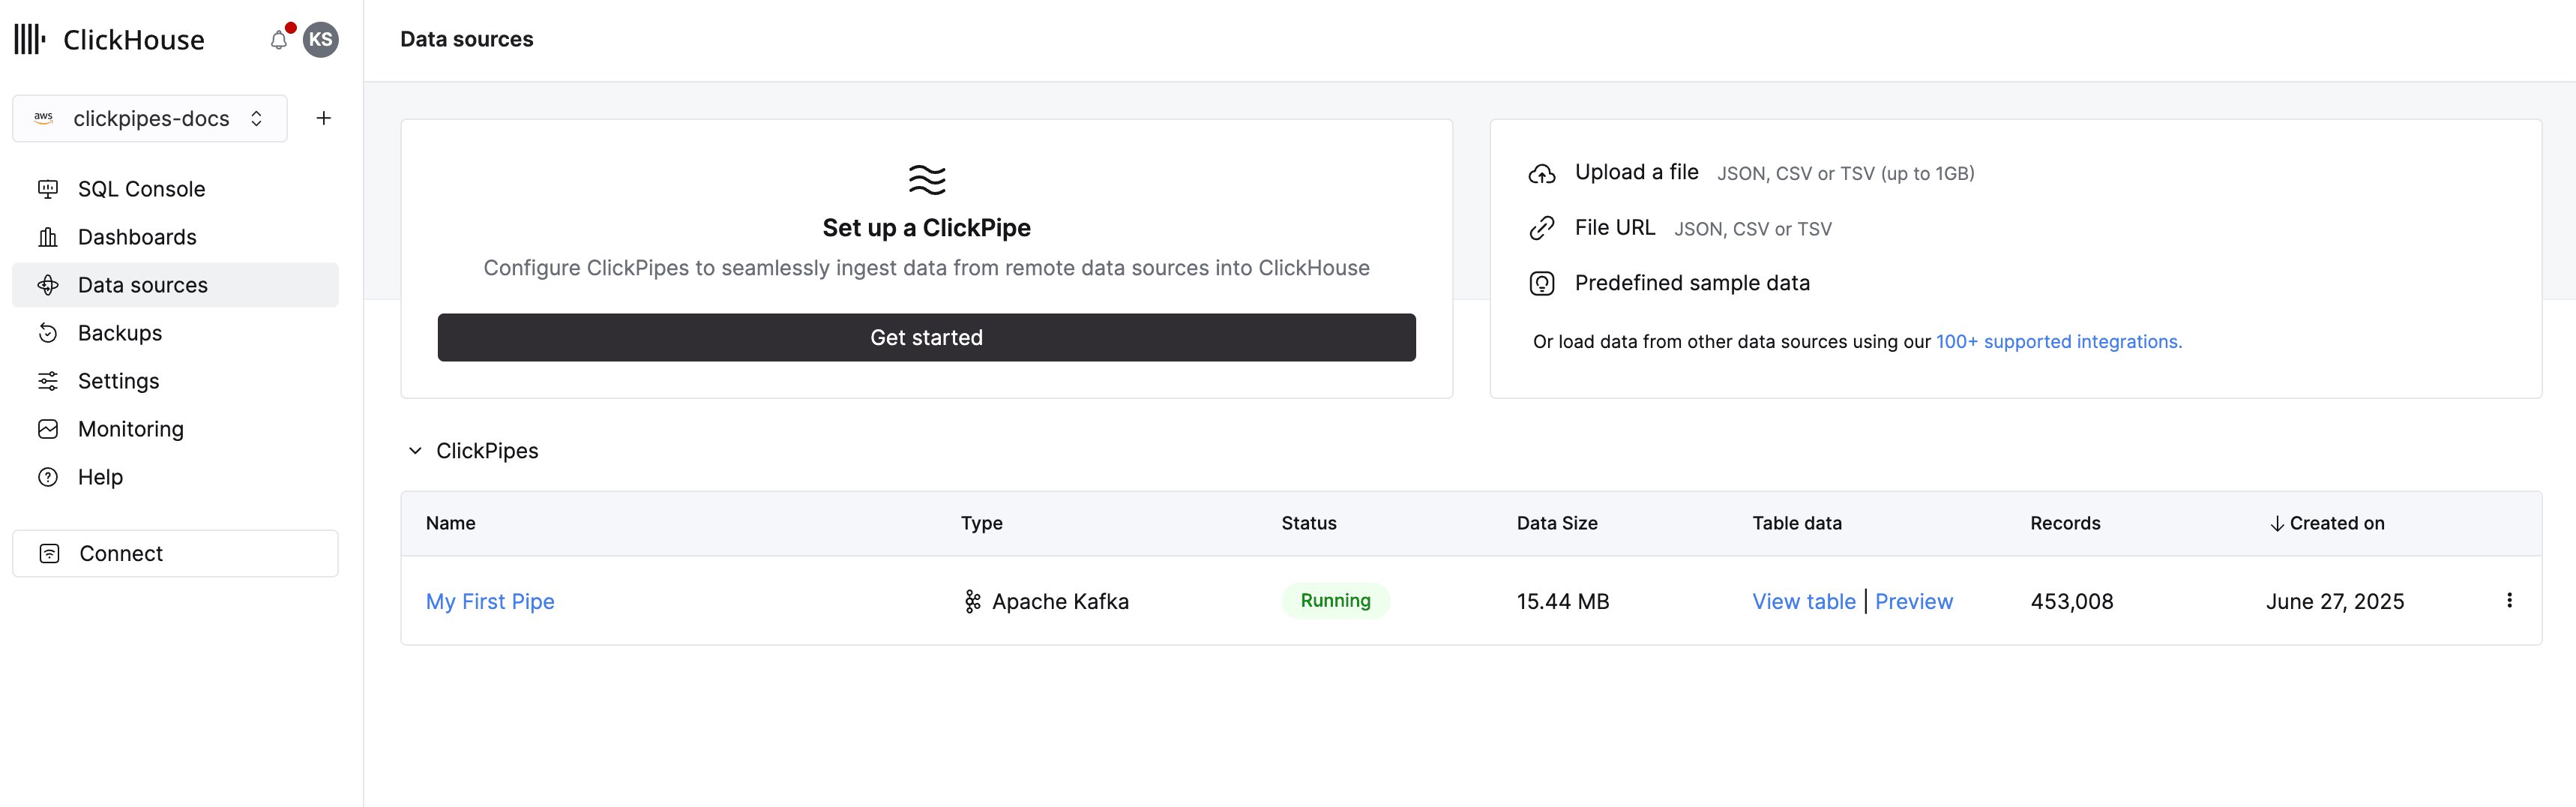 **恭喜!** 您已成功设置第一个 ClickPipe。
如果这是一个配置为持续摄取的 ClickPipe,它将持续运行,并从远程数据源实时摄取数据。
否则,它会摄取该批次数据后完成。
**恭喜!** 您已成功设置第一个 ClickPipe。
如果这是一个配置为持续摄取的 ClickPipe,它将持续运行,并从远程数据源实时摄取数据。
否则,它会摄取该批次数据后完成。